


Tutorials – UE3 Lightmass
About : This tutorial will explain the basics of UE3′s new lighting system: Lightmass.
Target Audience : Intermediate
Platform : Unreal Engine 3
Last Update : October 2009
A Basic Setup
Lightmass is the new lighting system in Unreal for calculating realistic static lighting. It is a global illumination lighting renderer that is a lot more powerful than Unreal’s old lighting system. As an example, Mirrors Edge made great use of extensive global illumination lighting, and even while that game wasn’t built using Lightmass, Lightmass can give near identical results. Another strength of the system is that it will render translucent shadows. A colored stained window will truly cast colored lighting on its surroundings for example. LM is also fairly easy to work with. There are a lot of properties and options, but most are hidden away. Getting a basic scene with lightmass going takes no more than just adding a light and enabling LM.
Get or create a test level, most preferably a very small and simple level to keep the compile times low. It is also best to use bright textures, as those will do a much better job showing the power of lightmass.
Add a standard light somewhere in the level, and open its properties. In the section Light – LightComponent – Lightmass you can change some basic relevant settings.
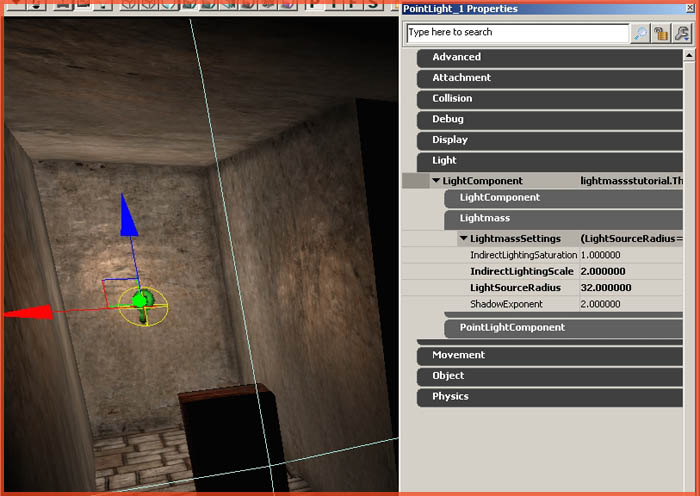
You don’t have to change these properties if you don’t want to. It will work just fine with default settings.
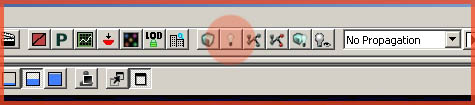
Next up, hit the Rebuild Lighting button and in the pop up window be sure to have lightmass enabled.
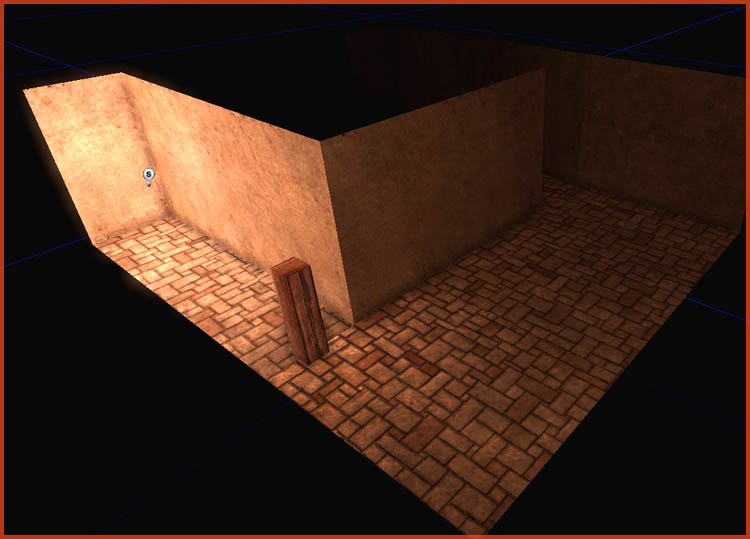
You should end up with something pretty. In my case I built a small C shaped room and the single light nicely bends around the corner and illuminates the rest of the level.
Also note that when working with LM, for best results, all staticmeshes in a scene should be lightmapped. Gone is the predominant vertex light approach found in UT3 and the other first generation of UE3 games. You will notice when placing staticmeshes they will automatically be set to lightmapping nowadays. If you want to go back to vertex lighting you should turn these properties back off. That means bOverrideLightmapResolution True, and OverriddenLightmapResolution 0 in the properties of a staticmesh. I have a lightmap tutorial available here, detailing the process and the properties.
Lightmass Importance Volumes
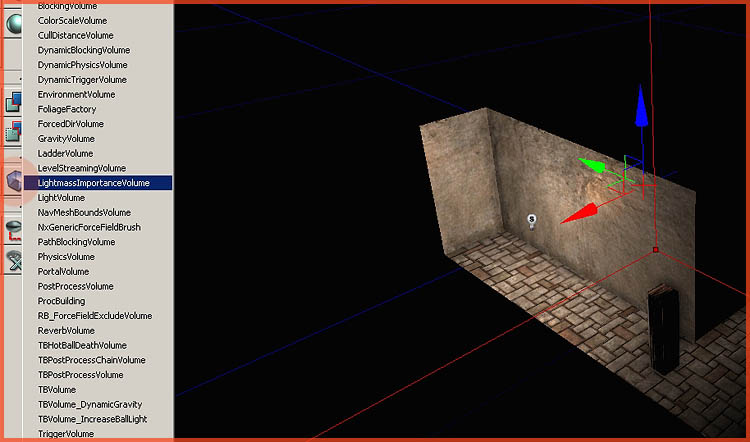
You may have noticed that the lighting rebuild you just did popped up an error about a missing lightmass importance volume. A LM importance volume is a special volume that determines how high the quality should be in a specific area. So everything inside one of those volumes will receive full quality lighting, the parts outside these volumes however will be lower in quality. The practical use of this is for example a level surrounded by a city. In such case only the playable section of the level should be covered with the volume because it would be pointless to calculate high quality lighting for that surrounding and distant city.
Creating one is a five second job. Make a big brush that covers the playable section of your level. Right click the volume button and pick the right volume. You are done! It is that simple.
Materials That Emit Lighting
One of the awesome features of Lightmass is that you no longer need to use a light actor anymore. You can actually let emissive textures emit real lighting on the world! That does not mean that regular light actors have become completely irrelevant though. Regular lights offer a lot more control over what happens than materials so there most certainly still is use for them. You are best of combining the two for optimal results/workflow speed/power.
Staticmeshes
Place a staticmesh somewhere that has a strong emissive hooked up in the material. You can check this by opening the material it uses and see what is connected to the Emissive input. That what is connected to Emissive, and the strength of it, will control the color and intensity of the lighting it will emit.
Upon placing this staticmesh somewhere open up its properties and navigate to StaticmeshActor – StaticMeshComponent – Lightmass – LightmassSettings and Enable bUseEmissiveForStaticLighting.
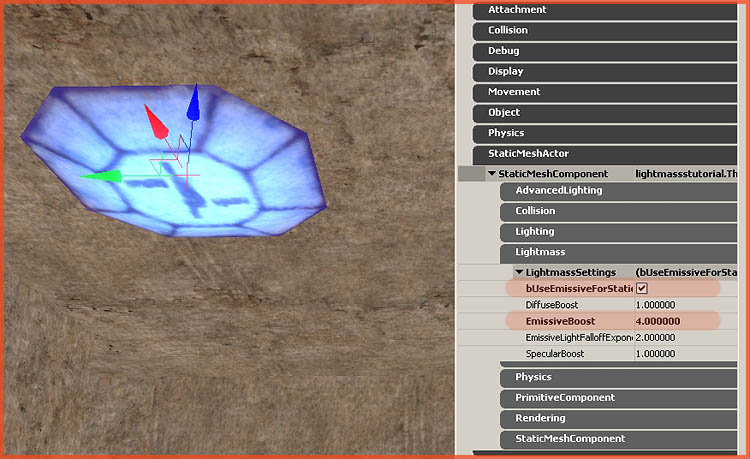
You can bump up the EmissiveBoost for additional intensity. Now rebuild the level again.
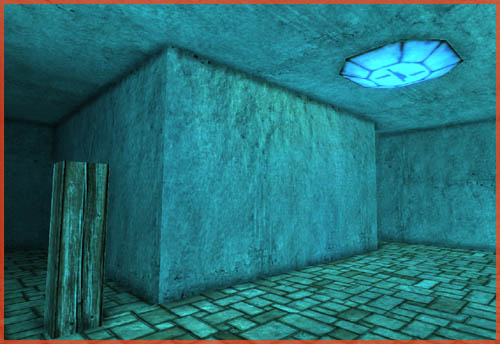
With no lights in the scene but my staticmesh the scene still lits up nicely.
Brushes
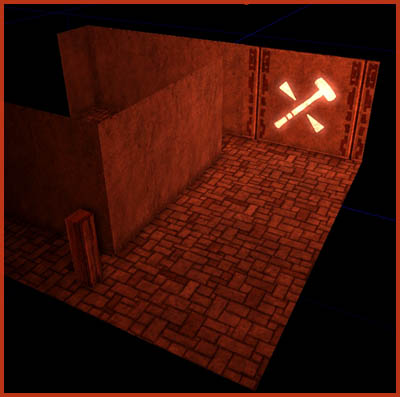
The exact same thing is true for brushes, only you enable it on a different location. Assign a material that makes use of Emissive to some of your brush surfaces and open up the surface properties (F5).
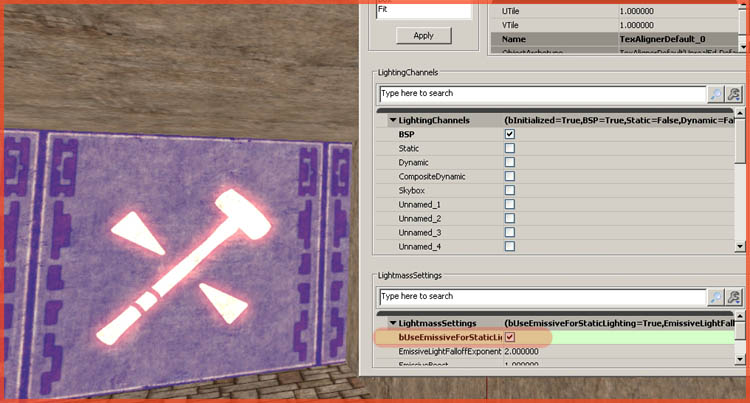
Down at the bottom of the window enable it just like you had to for a staticmesh, and hit rebuild again.
Advanced Properties
Want more control? Navigate to the world properties and notice the section LightMass that contains two dozen additional properties.
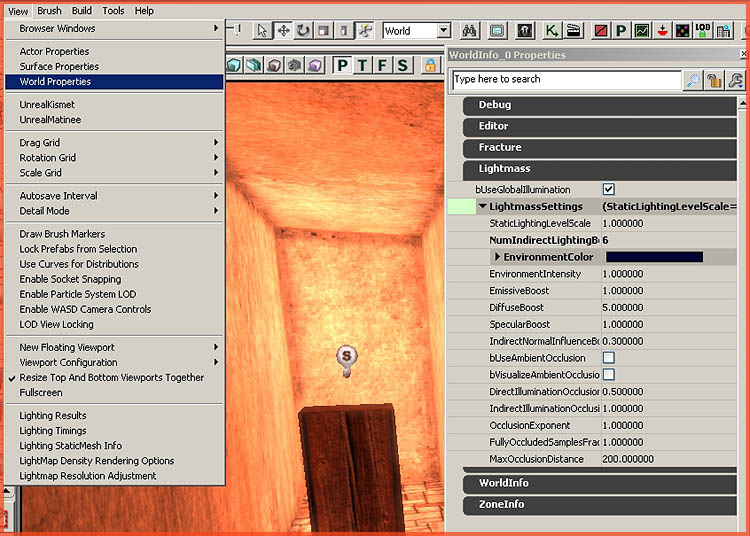
One of the most important properties is NumIndirectLightingBounces. This value controls how many times the light bounces around in the level. Lowering this value will soften out the effects of global illumination and darken the scene more.
Still not enough? Have a look at the lightmass ini file in the config folder of your game for even more settings.