


Tutorials – UE3 Material Editor Introduction
About : Introduction to the basic workings of the Material Editor.
Target Audience : Total beginners
Platform : Unreal Engine 3
Last Update : May 2011
Introduction
Before we start with the tutorial itself it is important to have a basic understanding of the mathematics behind all this. The material system in UE3 relies on numbers and math. Multiply, Subtract, Sine, Add, and so on are all present. Images in reality are nothing but thousands of numbers, we interpret those numbers are visual information. You don’t need to be a math genius if you ever want to become fluent in the material editor, after all I am most certainly not one myself either, but some basic understanding of the mathematics behind all of this is preferred.
Here is an evening photo of Stockholm.
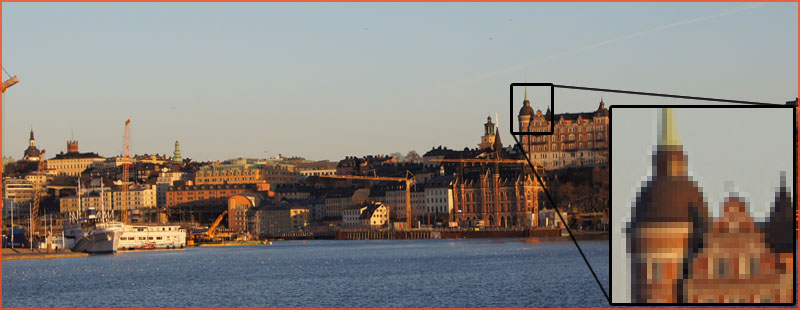
If you would zoom in all the way, you would see that the image is made up of blocks of color. Pixels.
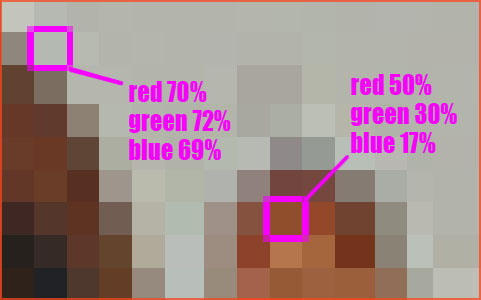
Each pixel is made up of three primary colors. Red Green and Blue. The color and brightness is controlled by just how much of each primary color there is in that pixel. A red pixel would obviously have near 100% red and near 0% blue and green. If all three primary colors are at a 100% you get white, and the other way around for black.
And since you have numbers, you can apply math for them.
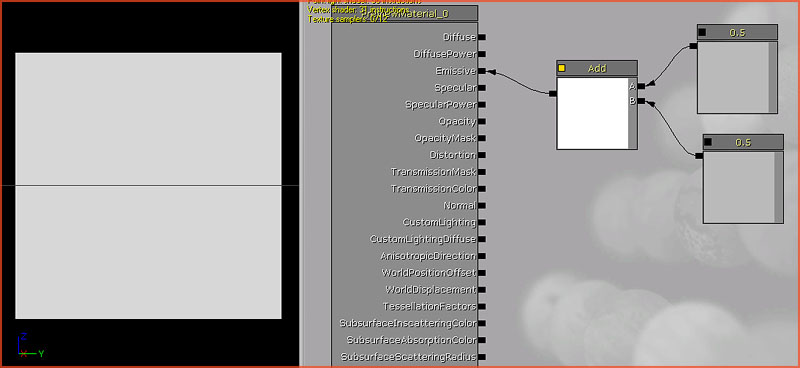
Unreal uses a scale between 0 and 1. 1 should be viewed as a 100%, 0 as 0%. Thus 0.5 is 50% of that color. 0.5 means perfect gray. If we would add 0.5 + 0.5 we would get 1 however, or 100% white.
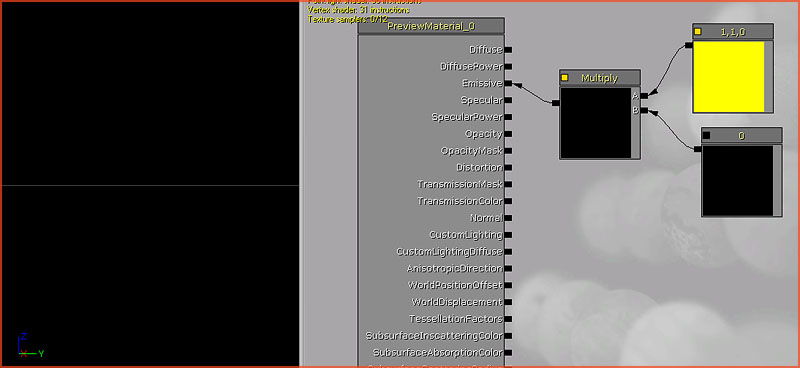
Similarly if we would multiply 0.5 with 0.5 we would get 0.25, and thus a darker result. If we multiply a yellow color with 0 then the result with be black, because 0*Red 1 and 0*1 Green (red and green together make yellow) is still very much so 0, thus black. Yellow multiplied by a value of 1 will be entirely unchanged because 1*1 is still 1. And so on.
If an image is multiplied by itself it will raise the contrast. Small values such as 0.1 will become even smaller. 0.1*0.1 makes 0.01. Large values however will only increase a little. 0.9*0.9 makes 0.81, still quite high. Thus the difference between bright and dark increases thus the result is a higher contrast.
It is possible to have values over 1.0 in UE3. Anything over 1.0 will increase the strength and brightness beyond what is normally possible. High Dynamic Range. Especially important for everything to do with lighting. The higher the value the more it will glow and bloom.
One of the most important basic things one must understand is that any texture you see in an Unreal Engine 3 game is a material and not just texture. Textures can not be directly assigned to geometry or particles. This is similar in approach as Maya and 3DSMax.
The Basics
Lets go over the basics by importing a texture/image. Just like in any other game engine, imported textures must have a valid resolution. Valid numbers are 4, 8, 16, 32, 64, 128, 256, 512, 1024, 2048, 4096. Textures don’t have to be square, they can be rectangular, so for example 64×1024 is ok. The standard filetype used for importing is TGA, but BMP and similar filetypes are also supported. Filenames may not have spaces in the name.
In the editor open up the Content Browser
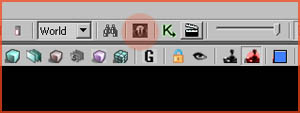
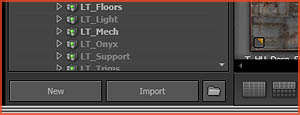
And click Import at the bottom left corner.
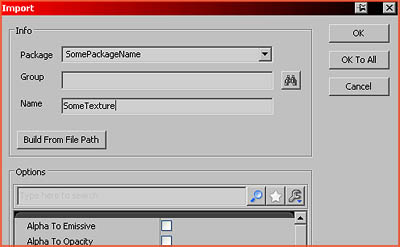
Select the file of choice, and enter the name and package in the next window. Enter/Select either an existing package name, to import the texture into an existing package, or enter a brand new name to create a new package.
After you have imported your texture it will show up as a red bordered asset in the Content Browser. If it does not, refer to the log window (top row of tabs in the Content browser) for a clue why it refuses to accept the file.
To make a new material, click the button New at the bottom left of the Content Browser and enter a package name, a group (group names are always optionally, leave blank if you have no desire for one), and the name of the material. Note that Unreal doesn’t like spaces or other weird characters in package or asset names, and that unique names are always preferred.
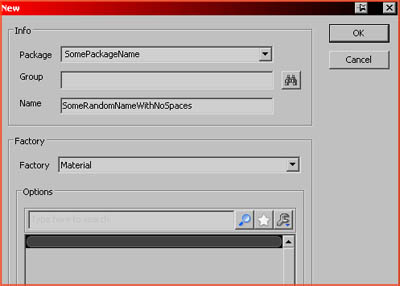
Be sure to select Material, in he Factory drop down menu.
After you’ve done that you should see the green bordered material in the Content Browser. Open the material editor by double clicking it.
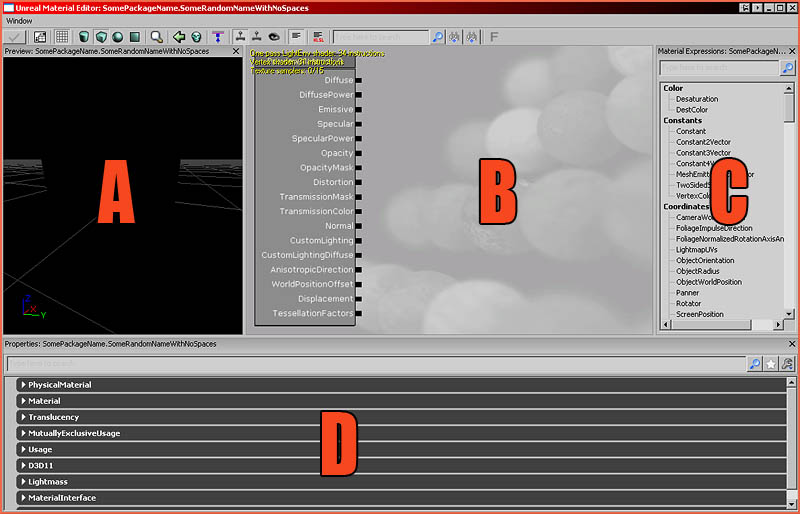
The left area (A) contains the preview cube/sphere/cylinder/plane. The center (B) is the actual working area where you will be making the connections between the different expressions and the right panel (C) is the list of available expressions. The bottom area (D) holds the properties of whatever expression selected.
Does the huge list of available expressions scare you? Don’t worry, 90% of the list is rarely used.
Keep the Material Editor open and select the red bordered texture of choice in the Content Browser and then return back to the Material Editor. Next, in the right expression list select “TextureSample” and drag it onto the working area (B). The texture you had selected in the Content Browser has has been automatically assigned to it.
Next, click on the little black square (black=all RGB channels together, red/green/blue=each RGB channel individually, white=alpha channel) on the left side of the TextureSample expression and drag it to Diffuse on the big block on the left side of the working area. If you did this correctly you now connected the texture to the diffuse input.
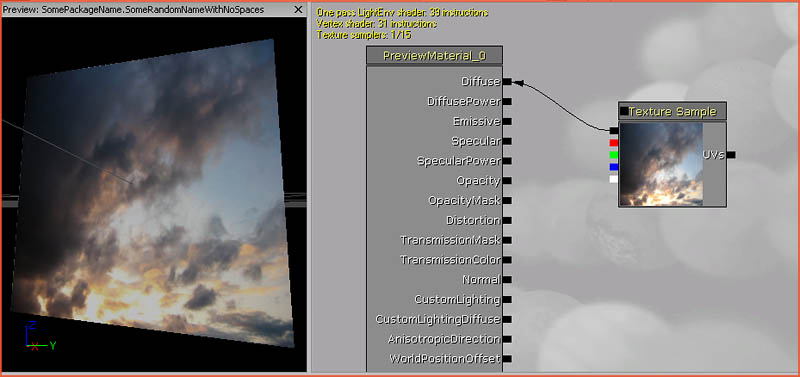
You now made a very basic material and the material is now ready to be assigned to a piece of geometry. Don’t forget to manually save the package the texture is in! Rightclick the package name in the Content Browser and save it.