


Tutorials – UE3 UI Scenes
About : This tutorial will introduce the reader to UIScenes, for creation of HUD elements, menus, and things like subtitles and titles.
Target Audience : Unreal Engine 3 users – Intermediates
Platform : Unreal Engine 3
Last Update : June 2009 – Update July 2011: UIScenes were removed from UE3 around late 2010.
A Basic UIScene
This tutorial will introduce you to the UIScene. UIScene is a sub editor that is responsible for everything to do with the interface. All menus, the HUD, text displayed during the game, and so on. In this tutorial we will set up a UIScene that displays a line of text on the screen, together with an image.
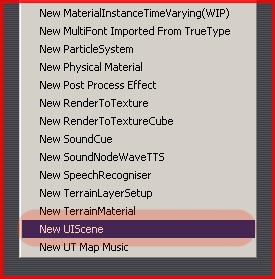
Start by creating a new UIScene somewhere in the generic browser. So either make a new package, add it to an existing package, or embed it into your level (by naming the package exactly the same as your level). Whatever you pick, right click in that package and pick New UIScene.
The UIScene Editor should open automatically. If it does not, simply double click the UIScene in the Generic Browser.
The UIScene editor is navigated much like the others sub editors. Left or right mouse pans the view. Holding both zooms in and out. Zoom out until you see the blue frame. This is the edge of the screen, so whatever you do, make sure it is inside this frame.
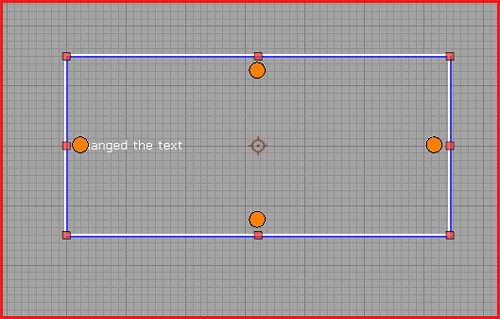
Right click somewhere in that empty space and pick Place Widget and then Label at the top of the list. A label now shows up at the top left of the screen. Drag it to somewhere else holding CTRL and drag the mouse. Scale it up if you want.
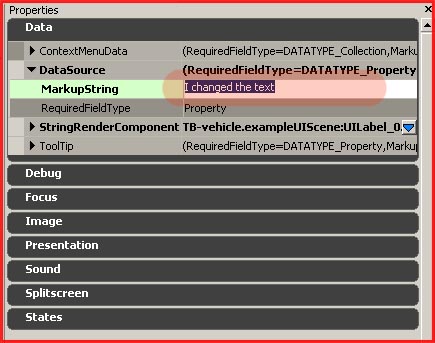
On the right side is a section Properties. If you do not see this section, go to the top menu Window – Properties. In Properties go to Data – DataSource – MarkupString. This is the text displayed, so change this to whatever you want.
Further down below in Data, there is StringRenderComponent. In there there is StyleOverride. This bit holds a few interesting properties that allow you to quickly alter the appearance of the text. In my example I changed the color, I assigned a different (and higher quality) font, and I scaled it up.
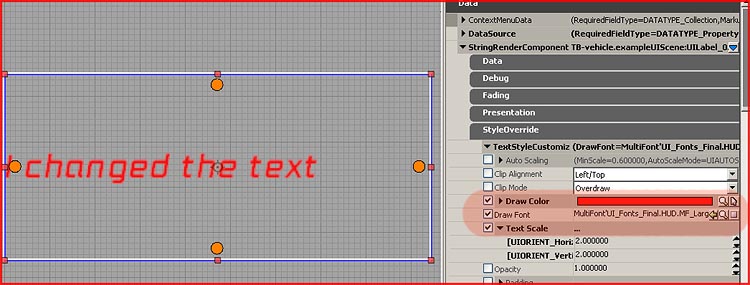
In UT3, fonts can be found in the packages UI_Fonts and UI_Fonts_Final. If you want to display big text, make sure you pick a high quality and large font. Unlike most other programs, not every font can be scaled up to whatever size you want. The fonts are actually images, so the quality depends on the resolution of the image. Therefore, if you want big text, you need a high resolution font. So choose wisely.
An Image
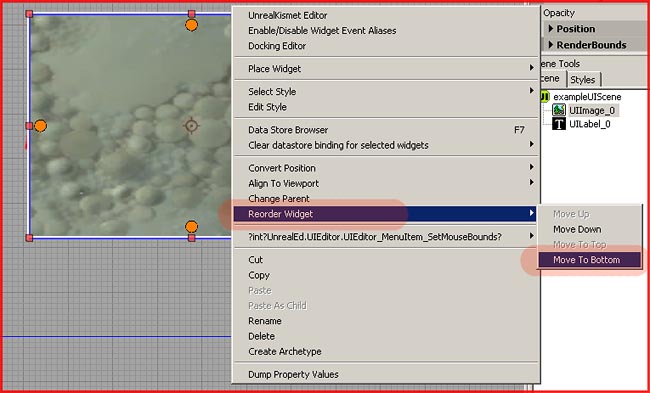
Next, right click again somewhere in an empty space, Place Widget, and go for Image this time, also near the top of the list. Again move and expand the image frame it creates. Notice how it covers up the text if you place it over it. If you want the image to appear behind the text, you must give the text a higher priority.
Rightclick the image – Reorder Widget – Move to Bottom.
Next, assign an actual image to the frame. Select the image frame and in its properties navigate to Image – ImageComponent – StyleOverride – ImageRef. Add a texture here.
And note, it must be a texture, not a material!
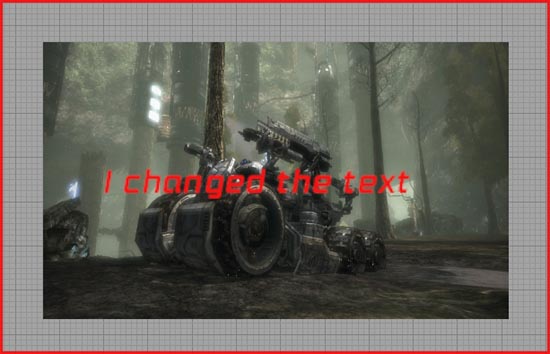
I applied a screenshot of the game and my test scene now looks like this.
Docking
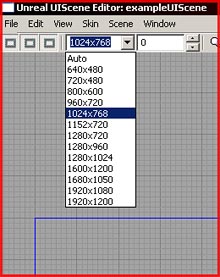
Next up is docking. At the top left of the UIScene Editor you can see a drop down menu with resolutions. Change this to some other number, and see what happens to your text and image. Especially try a very low resolution like 640×480. It probably doesn’t look all that nice on all these resolutions. Unless what you made is very small, it likely goes out of the blue frame on low resolutions and that is really bad.
You need to tell the editor to correctly scale and move the elements inside the UIScene along with the resolution that was set.
Select either the text or the image, and notice the big four orange dots in the middle of each side. These allow you to hook up that side to some other element and basically lock it.
Select one of these, and start dragging. Notice how red dots appear on the blue frame. Drag it to these to make it connect. Connect all sides to the corresponding sides of the blue frame.
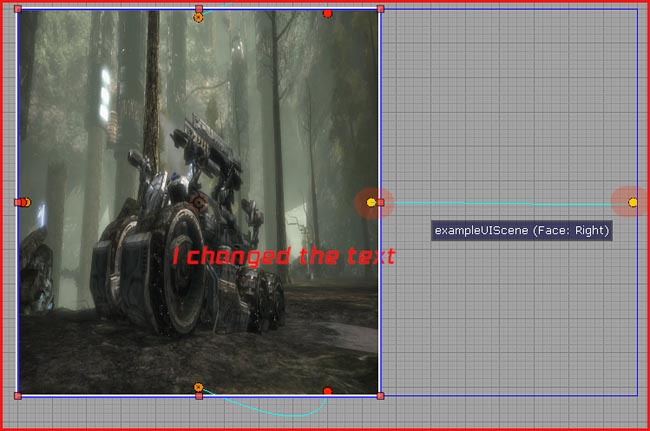
This will make your image, or your text cover the entire screen. Scale up or down the resolution and notice how the text and/or the image now do correctly scale along.
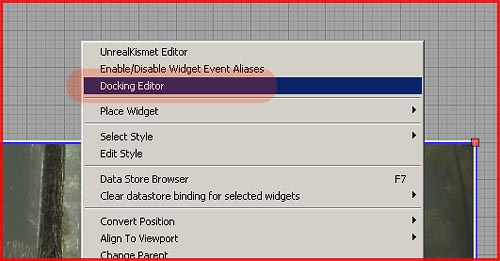
Next, we are going to make sure it doesn’t cover the entire screen but has some empty space around it. Right click the image or the text, dependent what you linked to the blue frame, and open the Docking Editor.
This little sub-sub editor gives you some more control over how elements are locked together.
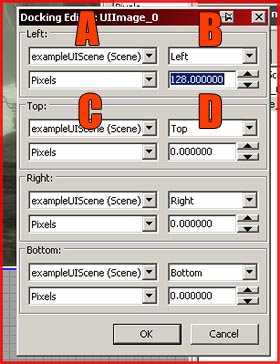
A. The Left Side locks to exampleUIScene which is the blue frame. The blue frame has the name that you gave to the UIScene in the Generic Browser.
B. My Left side locks to the Left side of that blue frame. So this property identifies to what side of the target it should connect. Usually you want to select the same side here.
C. It is using pixels as measurement.
D. Here you can enter the number of pixels it should be offsetted from that edge. Upon entering 128 here, it offsets the image 128 pixels from the blue frame, creating empty space in between..
Do be careful with this however. 128 Pixels on 640×480 obviously covers a whole lot more of the screen than on some very high resolution. For that reason it is usually a better idea to change Pixels to one of the other options given, such as Percentage of Screen.
Also note that you can also enter negative numbers if you want to offset it into the other direction. If you would have entered 128 Pixels on the right side, it would offset the element away from the screen. The center of the Scene is in the middle of the screen, so if you want to bring something away from the edge on the left side you would need +128, but -128 on the right side. The same goes for top and bottom.
More Properties
Click onto some empty space to get the Properties Section to display the main properties of the entire UIScene. In there, a number of interesting options can be found.
Kismet
And finally the last thing left is to make Kismet display the UIScene during the game. Open Kismet and add New Event – Level Startup. Next, New Action – UI – and add both Open Scene and Close Scene. It would also be a good idea to add a Delay in between, found in New Action – Misc – Delay.
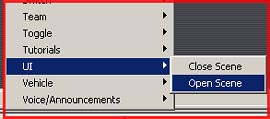
Hook it up like shown in the screenshot, and be sure to fill in the UIScene you made in both the Open Scene and Close Scene properties or it will not work.

Upon starting the level, this setup will display your scene for five seconds and then close it again. If you want to display multiply scenes, continue adding Open Scene and Close Scene nodes.