Tutorials – Texture Photography
About : The do’s and dont’s of taking good source photos for tiling texture creation.
Target Audience : Those who own a digital camera
Platform : Any 2D package.
Latest Update : May 2008
Introduction
This tutorial will explain a number of random things to keep in mind while taking photos to create tiling textures of. I learned all of these tricks throughout the years when working on my own free texture packs.
I used a Canon Powershot A80 for quite a few years, and I am currently using a Sony A55. I always use cameras that have a rotating LCD screen, to allow me to hold the camera in strange angles and still have a clear view on what it sees, which is handy for taking photos of surfaces well over your head for example.
You could try to get rid of all the problems described below in a 2D package, but that would cost a considerable amount of time. Why make it harder for yourself if you could simply take better photos in the first place?
Also a general tip regarding taking the photos. If you always end up with blurry photos, try using a 2 second delay on your camera. If you press the button to take a photo, you also always slightly lower the camera for a second, causing the camera to move a few milimeters and having you end up a blurry photo. By enabling a delay, you can give your hands the time to restabilize the camera before the actual photo is taken.
Thanks to Cgtextures.com for providing me with about half of these photos.
The Do’s and Dont’s
No Shadows
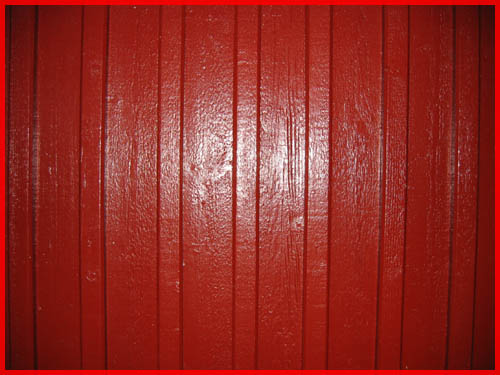
Textures must be neutral. If a photo has a strong and sharp shadow, it will be difficult to turn it into a good and neutral texture. What if you, or someone else, would like to use the texture in a location that lacks a strong light source? What if you wish to use the texture together with another texture that doesn’t has very well defined shadows? A strong shadow will also make it tile more obvious as its pattern becomes more obvious.

No shadows also means no gradients. Photos that have a clear gradient, like having a noticeable brighter upper half, will tile badly.
Be Careful With The Sun
Besides problems with shadows, you should also be careful taking photos into the direction of the sun. The smallest ray of direct sunlight can seriously ruin an otherwise great photo.
In the above photo I tried to make a photo of the back of this mine car, and hoped to exploit the shadow on that side. It didn’t work out as you can see, as the sun still managed to hit the lens and ruin the photo. The sun in this photo was directly behind the mine car. If the mine car wouldn’t be there, you would be looking almost straight into the sun. This is obviously a bad example. If the object isn’t big enough to drop a shadow big enough to provide cover for you, don’t bother trying.
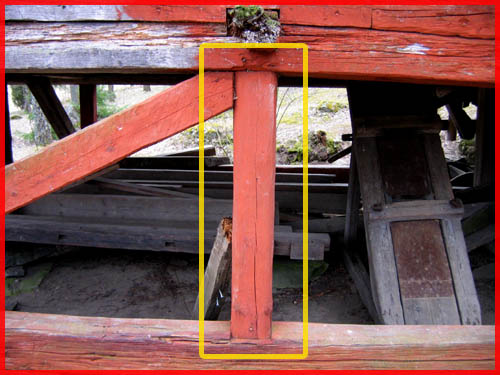
No Perspective
Always take photos of surfaces from straight in front of it. Any type of perspective will be difficult to get rid of later on. While a subtle perspective is pretty easy to fix, a strong perspective is near impossible to get right later on. Roofs are especially difficult for this reason as you can almost never take a photo of a roof in the right angle.
Get The Right Distance
Don’t take your photos too close by. Too far away is usually better than too close by. If you take your photos from too close by, you need to scale them a lot smaller in the game/3D application later on, which will make their tiling a lot more obvious. Stick to a larger scale so the result is more varied when tiled.
Flat Surfaces Only
Don’t take photos of surfaces that are too curved as the perspective in those will make it impossible to tile later on. Such surfaces usually also have unevenly distributed light.
Small Strips Can Also Be Cool
Don’t just look for large and flat surfaces. Small but long strips of things can also be great.
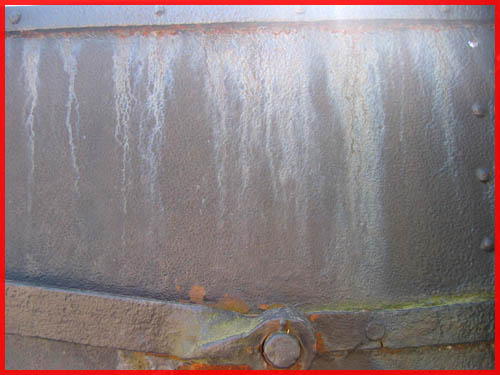
Beware Of Details And Dirt
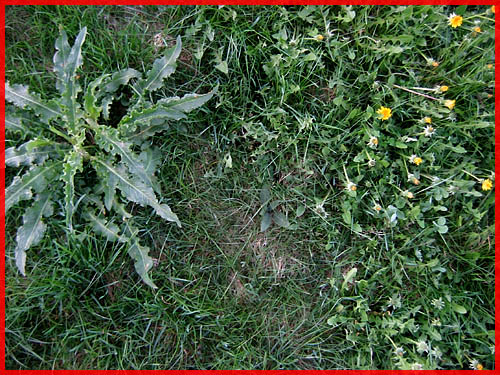
Details can be a scale reference and that is bad. Some textures can easily be scaled much larger without looking unnatural, provided that the viewer has nothing that he or she definitely knows the scale of. A rock texture can easily be made larger than it was in real life, unless however, there was a leaf on it somewhere, or a small plant, as then the actual scale becomes clear.
The several small plants and the random debris scattered over this rock will make it impossible to scale up the texture later on.
The same goes for dirt. Some dirt is cool, and almost essential for most textures, but don’t overdo it.
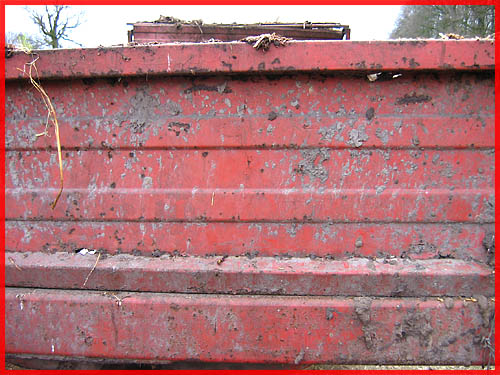
Another reason why too much dirt usually doesn’t work out well is because it makes the texture too specific. The texture would only be usable in an environment that justifies the large amount of dirt.
No Large Details Or Very Three Dimensional Things
Do not take photos of very three dimensional objects or details as they will look very flat later on once used in a level. Stick to relatively flat surfaces.

The grass on this photo is way too vertical, and has too much perspective. It is impossible to turn this photo into a texture.
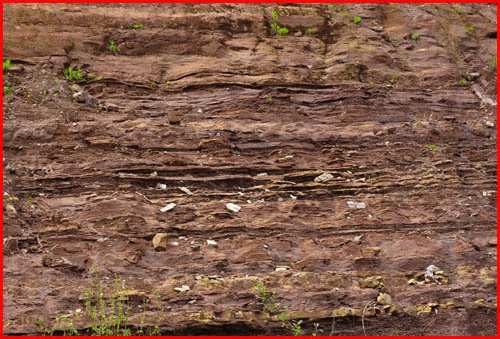
No Clear Patterns
Only take photos of surfaces which are pretty monotone and neutral. A clear difference in color somewhere, or a damaged or dirty area, will make it very difficult to tile later on.
This photo has too many different elements to be useful. If this photo were to be turned into a tillable texture, it would tile very obviously unless you would over paint half this photo.
Evenings Are Bad
When it gets evening, things tend to get a little "blue". The ambient lighting gets very blue in the evening, making it difficult to take natural looking photos. It basically adds a blue layer on top of everything. It may not always be apparent when you walk around somewhere, but it will be if you look at the photos on your computer later on.

The wood on this photo is much blue-er than it should be.
Also, it is harder to take photos if it is darker, as the camera will need more time for capturing the necessary amount of light. Taking photos in dark environments may have you end up with very blurry photos.
Glass Is Difficult
It can be horrible to take photos of windows as you will almost always end up with an obvious reflections in the glass. If you can move the object, move it to a place where it reflects less. So for example, move it into the shadows, or move it into an area with few objects nearby.
Also, if you always end up seeing yourself in the reflection, try adding a 10 second delay to it, and step away yourself while the camera takes the photo.
In the end, you could also just edit the reflection away though, and you probably will have to do so anyhow, no matter how hard you try.
Use High Detail Settings
Fairly obvious, but use the highest possible config the camera offers. The highest resolution and compression (or none even). The difference can be quite big. Also, try to stay away from high speed modes, unless you happen to have a brilliant and very expensive camera…
The Flash Is Always Bad
The flash is always bad! I never ever ever use the flash. The flash creates a gradient of light over the surface, which will darken the corners. It also adds strong shadows to everything and in general it feels very fake and unnatural. The only way to get realistic textures is by making use of realistic lighting!