Tutorials – UE3 Reflections/Cameras
About : This tutorial will explain the reader how to set up a simple real time reflection/camera.
Target Audience : Unreal Engine 3 users – Intermediates
Platform : Unreal Engine 3
Last Update : December 2007
Real Time Reflection
Real time reflection is quite hardware demanding and thus should not be abused. Use this powerful feature wisely and only for things that really matter, and in relatively low detail areas. Using it in a small bathroom would be ok, where as using it to make a camera oversee the entire battlefield, would not be.
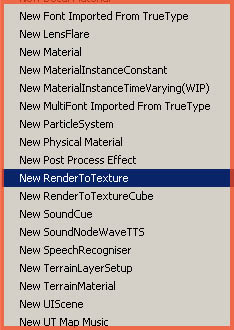
Start off by going to the Generic Browser, and create a RenderToTexture in a package of choice.
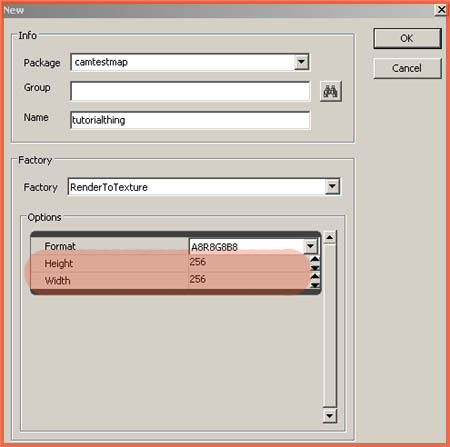
A new window will pop up, asking for a name and package name. Notice the Height and Width option at the bottom. These allow you to set the size for the RenderToTexture. The size of the thing has a direct impact on performance. A larger size obviously means more detail, but also being larger in data. The larger something is, the harder it will be for the hardware to continuously process it. Pick a size wisely.
Once you’ve got the RenderToTexture, leave it alone for the time being, and go to the Actor Browser. Navigate to SceneCaptureActor and expand that section. Select SceneCapture2DActor, and add that actor to the level at the desired location..
The actor is invisible, don’t worry about this. Open its properties by selecting the actor in the viewport, and pushing F4 on your keyboard. If you are having trouble selecting the actor, it is invisible after all, go to the Search Actors window, which is the button with a binoculars on, found at the top toolbar, and enter the name of the actor. In this case SceneCapture2DActor. Double click it in the list of results to select it.
In its properties, expand the SceneCaptureActor section, and while keeping the properties window open, navigate to your RenderToTexture thing you’ve made earlier, and select it in the Generic Browser. Add it to the TextureTarget in the properties of the SceneCapture2DActor using the little green arrow on the right.
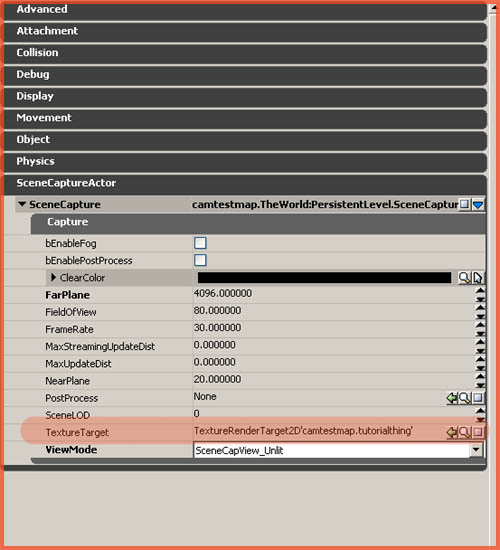
Other important properties are:
bEnableFog: To display fog or not
ClearColor: The color used for "empty" areas (used in combination with the Maximum/Minimum distance, everything beyond/below uses this color).
FarPlane: Maximum distance. Beyond this distance the actor cannot see.
FieldOfView: The "width" of the camera.
FrameRate: How smooth the capturing is. A higher number means a smoother result, but also a larger impact on performance.
NearPlane: The opposite of the Farplane, within this distance, the actor cannot see anything.
ViewMode: How to capture the scene.
Be sure to set the Farplane well beyond the default 500 units, or you will likely see too little, and you might need to change the ViewMode to Unlit if your scene is not yet lit!
Leave the SceneCapture2DActor as is, and return to the Generic Browser. Create a new material, and add your RenderToTexture to a regular TextureSample, and use it in a material.
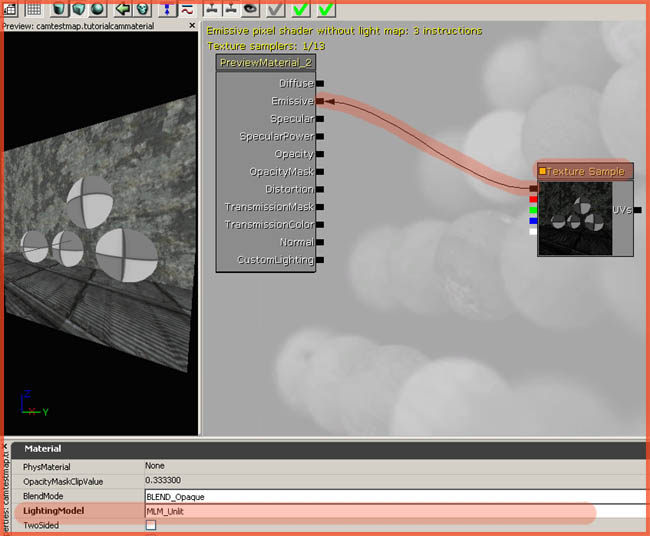
Now apply the material to a mesh or a surface, and you are done!
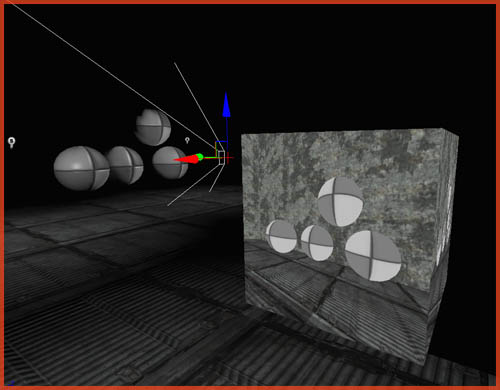
If you wish to view the camera frustum like in my screenshot, expand the viewport menu (the arrow pointing down in every viewport’s toolbar), and enable Camera Frustums near the top of the list.
Have a look at my material tutorials to get a better understanding on how to add cool effects to the RenderToTexture, such as distortion, or a moiree effect commonly seen on old TV’s.
It might also be worth having a look at the SceneCaptureReflectActor, which is a little fancier than the ScenCapture2DActor, and on the SceneCaptureCubeMapActor, which captures 360 degrees.


