


Tutorials – UE3 Water Volumes
About : This tutorial will explain the reader how to create a body of swimmable water in UT3.
Target Audience : UT3 – Beginners
Platform : Unreal Engine 3
Last Update : December 2007
The surface
Creating the surface is really simple. UT3 no longer uses Fluidsurfaces or similar, water is now just a simple plane with a fancy material on top. As such, simply add a plane in the level, and assign a nice material to it. Do not use BSP planes for water surfaces as those will cast a shadow nowadays.
Go to the Generic Browser, and find yourself a nice plane. Package UN_SimpleMeshes (loaded by default) has one. Add the plane to the level, and position it correctly. You may need to scale it up a lot to make it fit the area.
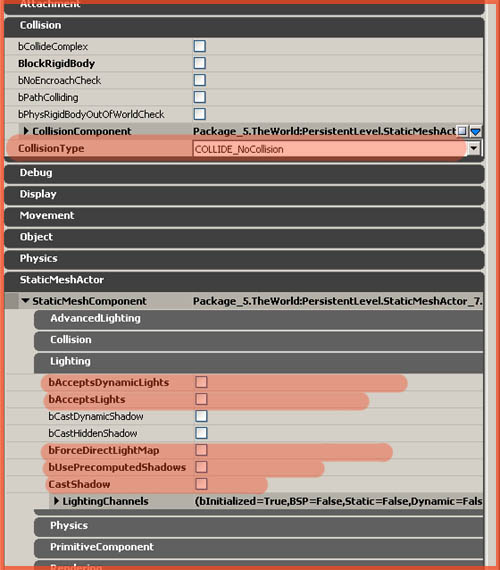
In its properties, expand the section Collision, and set CollisionType to NoCollision. Next, expand the section StaticMeshActor, and then the section Lighting, and disable everything.
Leave the properties window open, and return to the Generic Browser. Find yourself a neat water material. The packages UN_Liquid and UN_Liquid2 would be a good place to start. I personally used Material’UN_Liquid.SM.Materials.M_UN_Liquid_SM_DistortionRiver_01′ for this tutorial, although it is a one sided material which is kind of a problem, as you will notice later. It is also possible to create your own water materials, but this is quite a complex process, explained in detail in my two water material tutorials. So please refer to those if you plan on doing so.
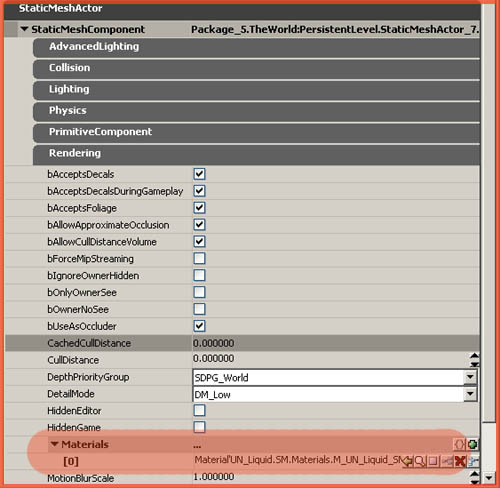
Assign the material to the plane using the Material property in the Rendering section of the properties of the Plane.
You’re done with the surface!
Making it swimmable
Resize the red builder brush so that it covers everything that you wish to flood. It is important to match the top face of the red builder brush exactly with the plane you’ve just placed, or else the water would actually end at another location than the plane would imply. The plane’s only use is to visually represent a body of water. The real water however is entirely independent of the plane. It would be possible to delete the plane, and still have water to swim in, albeit invisible water.
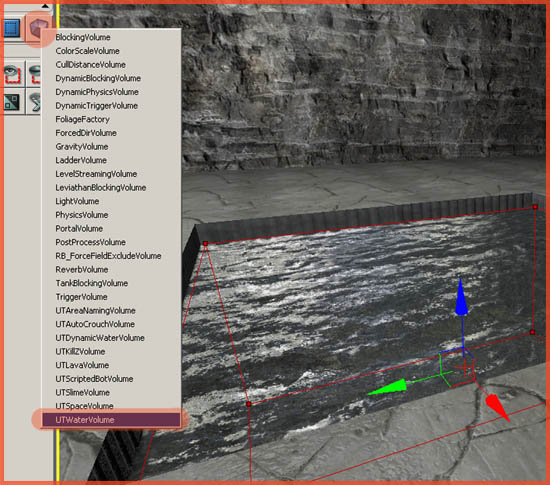
Once you have positioned the red builder brush correctly, rightclick the volume button on the left toolbar, and pick UTWaterVolume.
Now move the red builder brush away to reveal the pink water volume below. If you do not see it, you might have toggled volumes off with the ‘O’ key on the keyboard.
Your water is now swimmable!
Underwater
As things look differently underwater, you want to apply different post process settings to the area. To do so, make your red builder brush roughly the same size as your water volume, and position it on the same location. Note that it may help to actually make it slightly smaller or larger than the water volume, as it may be difficult selecting the volume else on if they are both on the same location.
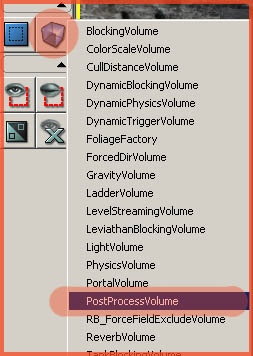
Once you have positioned the red builder brush correctly, add a PostProcessVolume.
You now have two volumes around your body of water. Select the PostProcessVolume you’ve just added, and open up its properties. Expand the section PostProcessVolume and configure the properties marked on the following screenshot.
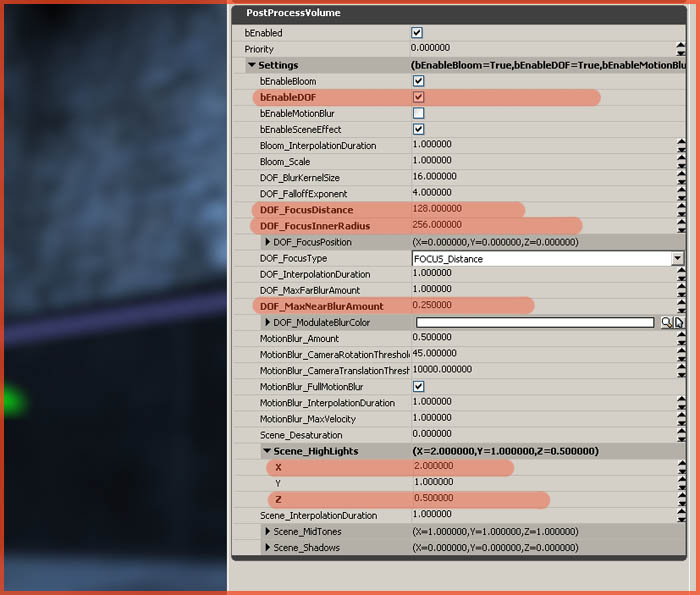
By enabling bEnableDOF, you enabled Depth Of field, causing the water to blur your vision, which you further tweaked with DOF_FocusDistance and InnerRadius and DOF_MaxNEarBlurAmount. Also, by changing Scene_Highlights X into 2.000000 and Z into 0.500000 you gave the water a blue overlay. Experiment all you like with these settings, as you can accomplish some great effects with these.
You are done! Additionally you can also add a HeightFog actor, to simulate depth in the body of water, but this will only work if the water is the lowest point of the level, as else the fog would also cover other areas of the level, and you obviously don’t want that. A fogvolume might bring relief in such case (Actor – Info – FogVolumeDensityInfo).
Lava, Slime, and similar are all handled the same way.