Tutorials – UE3 InterpActors
About : This tutorial will introduce the reader to the world of animated level geometry in UE3. Doors, elevators, and so on.
Target Audience : Unreal Engine 3 users – intermediate skill required
Platform : Unreal Engine 3 including RoboBlitz, GOW, UT3, UDK
Last Update : December 2010
A Basic Elevator/Door
For this tutorial we are going to make a moving plateau, call it an elevator if you want.
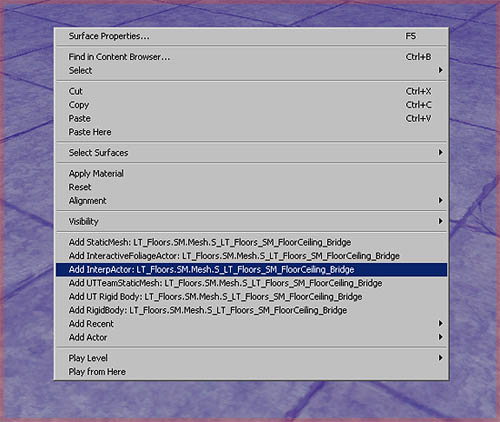
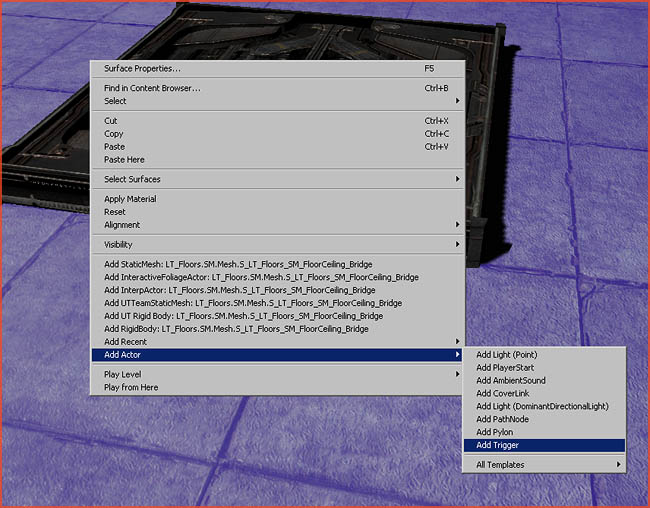
The first thing you need to do is to select the staticmesh you wish to use in the Content Browser, and then rightclick somewhere in a viewport and add it as an InterpActor.
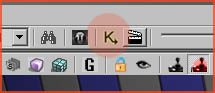
Next, open up Kismet. A button with a green “K” in the top toolbar.
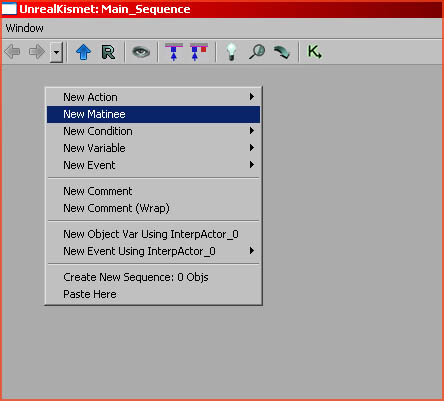
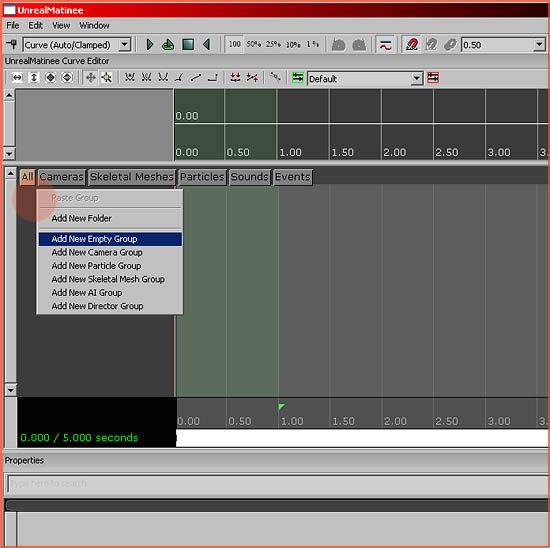
Keep the InterpActor you just made selected in the viewport, and then in the Kismet window rightclick the large empty grey space in the middle and add a New Matinee.
A Matinee block is added. Doubleclick this block to open the Matinee sub editor, and then rightclick in the dark grey space in the center left of this window. Add New Empty Group.
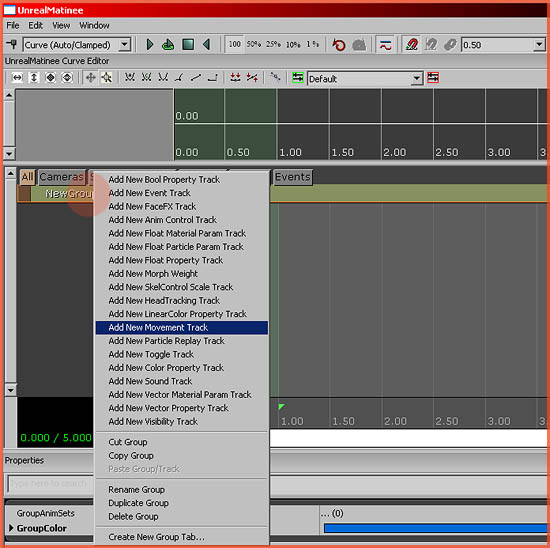
Rightclick the NewGroup you just made, and Add New Movement Track.
Move the timeline to another position, in my example it was moved to 3 seconds, by clicking in the dark grey space at the bottom of the timeline.Press “Enter” to add a Key to the current position. Keys are positions the engine remembers. Note how you can increase or decrease the length of the matinee by clicking and dragging the small orange triangle at the bottom right. In my example it is located at 4.5 Seconds.
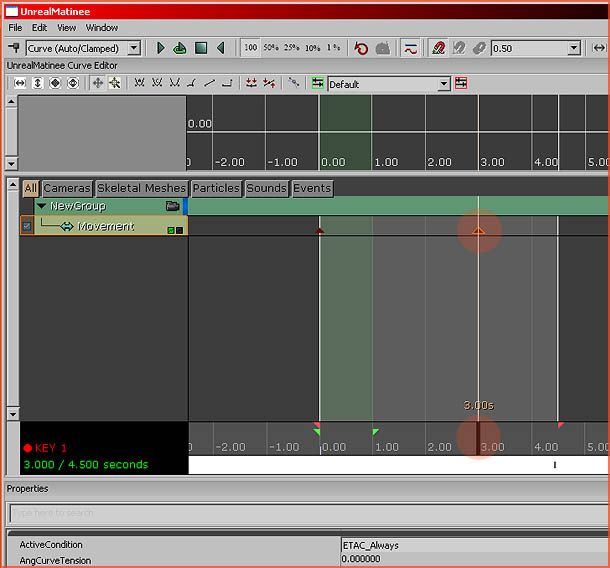
Keys are displayed as small dark red triangles, select the one you just added it if it is not already, and then while keeping this Matinee window open, go back to your viewport. Move the InterpActor the normal way, using the movement gizmo, and as soon as you moved it somewhere and let go of the mouse, you should see a yellow line appearing. This is the path the InterpActor will follow between its first position and the new position you just added.
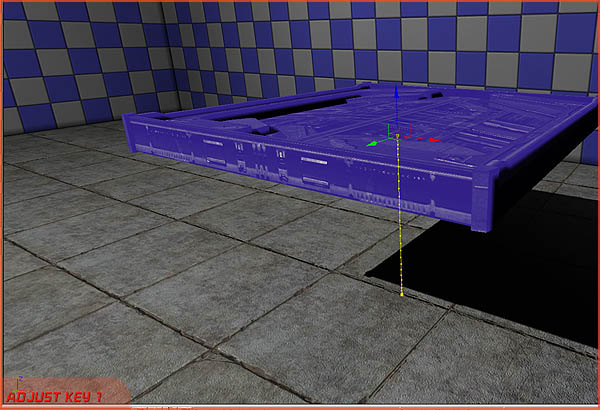
Note how it says Adjust Key 1 at the bottom left of the viewport. If this does not show up, you did not select the key in Matinee. Also, if no yellow line shows up then the InterpActor may not be properly associated with the Matinee you made. It is critical that the InterpActor is selected in the viewport throughout the entire process of creating a Matinee, a new Empty Group, and a New Movement Track. Delete the Matinee and try again if it does not work.
Return to the Matinee window, and click and drag the timeline around. You should see the InterpActor in the viewport moving around. You can also press the Play button at the top of the Matinee window to play your animation.
Next up we are going to add a trigger so the player can activate the animation in-game. Rightclick somewhere and Add Actor – Add Trigger.
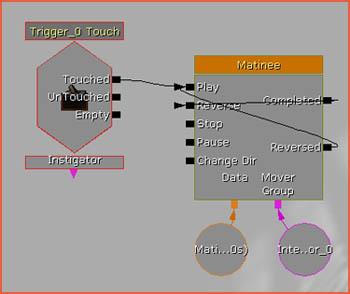
Select the trigger, and go to Kismet. Rightclick somewhere nearby the Matinee and click New Event Using Trigger_0 – Touch.
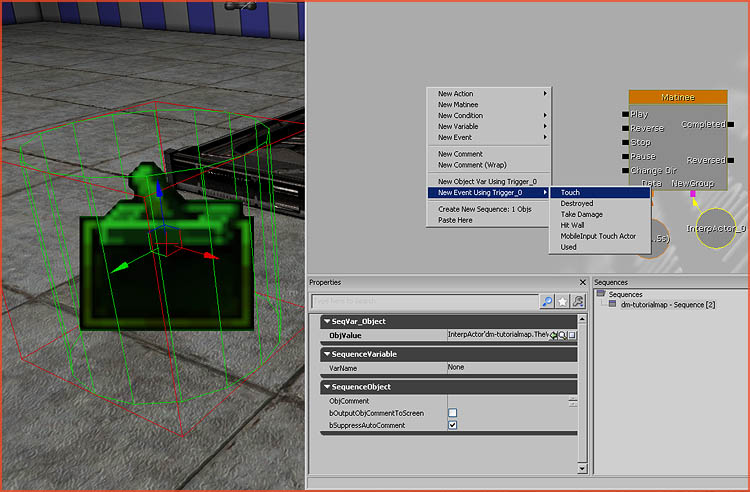
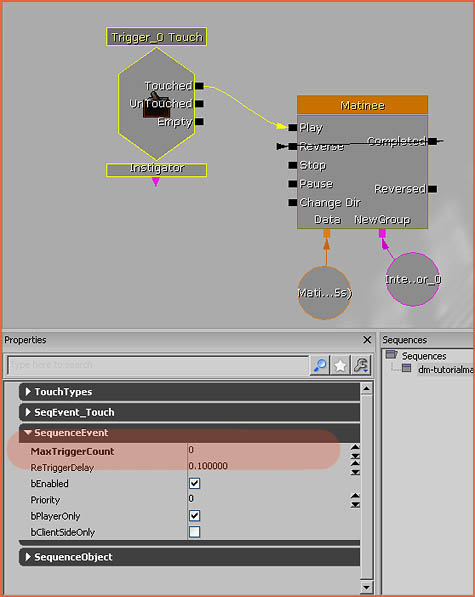
Connect Touched to Play, and connect the Matinee’s Completed to its own Reverse. This will make the platform return automatically as soon as it reaches the end of its animation. Also note how I set MaxTriggerCount to 0 in the properties of the Trigger_0 Touch event.
That’s it! You are done. As soon as you touch the trigger, the platform will play its animation!
Elevators – UT Style
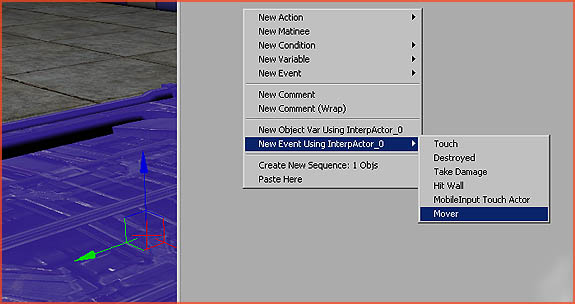
A special setup is available for UT style elevators. This method works without any triggers. Select your InterpActor, and then go to Kismet, rightclick, and pick New Event Using InterpActor_0 – Mover.
You will now automatically get this pre-made setup.
Simply open up the Matinee window and animate it the regular way and you are done!
A Continuously Looping Animation
Simply connect Matinee’s Completed to its own Reverse, and its Reversed to Play. This will make it go back and forth forever as soon as it is trigger once by an external event.
Another way to create a looping animation is by simply enabling the bLooping property found in the Matinee block in Kismet. Both approaches will get you roughly the same result.
A Continuously Rotating Animation
You could use Matinee to make a rotating animation, but it is usually easier to go with the oldschool approach, and simply do it all via the properties of the InterpActor. Open up those properties and navigate to the section Movement. Set Physics to PHYS_Rotating, and set a value to RotationRate.
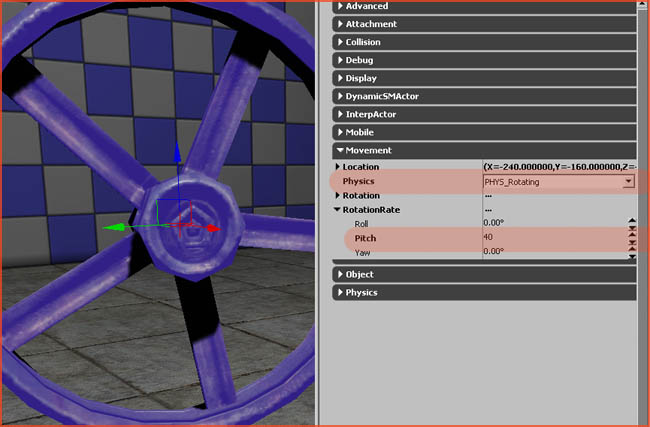
The value set in RotationRate is the degrees a second it will rotate.
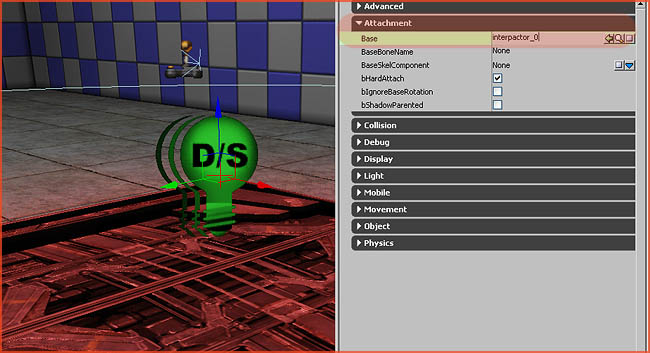
Attaching Something
If you want to attach for example a light to an InterpActor, you first of all need to make sure you have a dynamic version of the actor you wish to actor, which in my example can be found in the Actor Browser – Lights – PointLights – PointLightMovable. Remember that some actors are static and cannot be moved, and thus cannot be attached.
Next, open up the properties of whatever actor you want to attach, and navigate to Attachment. Enter the name of the actor you want to attach to in Base. In my case my InterpActor is called InterpActor_0, so I typed that in Base and I hit enter. That is it.