


Tutorials – UE3 Material Editor – Examples 2
About : More material examples. More complex.
Target Audience : Unreal Engine users – Intermediate/Advanced
Platform : Unreal Engine 3
Last Update : May 2011
The Examples
Material Instances
Material Instances are nifty things that can be used to make a quick and easy variation of an existing material setup without having to duplicate the entire setup. A Material Instance becomes a child of the original parent material. The biggest advantage of this approach is that when you have the need to modify or polish the original material, all children will also change along without any additional work.
Setting it up is pretty simple. Create a regular material and set it up like my example.
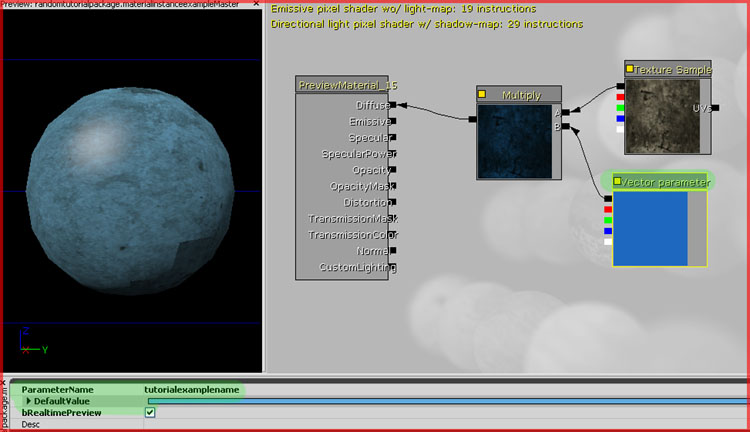
A TextureSample that is multiplied with a solid color to get a blue variation of the original texture. The special thing however is that I did not use a regular Constant3Vector expression, but a Vector Parameter expression. All the Parameter expressions are expressions that can be accessed and changed by Instanced Materials. Regular expressions cannot.
The Vector Parameter has a ParameterName set (“tutorialexamplename”) and it has a default color assigned, in this case blue. Once that’s set up you can close the material and create a MaterialInstanceConstant in the Generic Browser (rightclick an empty space in the browser -> New MaterialInstanceConstant).
Double click it to get to its properties and configure it as shown in my example.
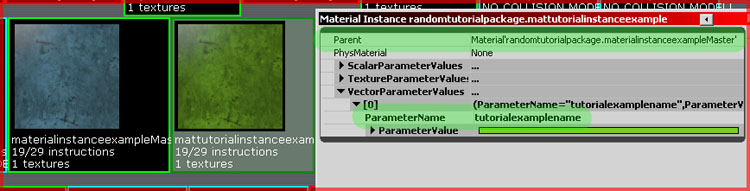
Point the Instance to the Parent Material and add a new item to VectorParameterValues. In that new item you need to set the ParameterName, in this case that was “tutorialexamplename” and from then on you can modify the color as many times as you want.
As you can see there is also a ScalarParameter and a TextureParameter, they work likewise.
Blending textures by using the Vertex Colors
Just like UE2, UE3 too supports blending textures by making use of the Vertex Colors assigned to the Staticmesh. How to set up Vertex Colors in Max can be read in my Vertex Color tutorial. Also note, in the picture I use two Constant3Vectors instead of two textures, just for the sake of the example, and I linked the whole setup to Emissive, undesirable in practical use. Also, if the material also has normal and specular maps, duplicate the entire setup for those.
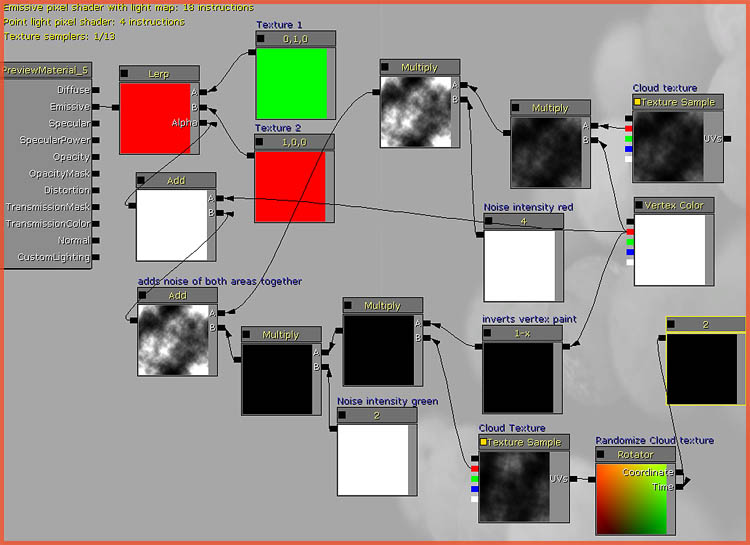
The material as shown in the screenshot is not your typical Vertex Color blend setup.. Technically you only need two TextureSamples (two Constant3Vectors in this example), a Vertex Color expression, and a LERP. In my example however, I also added noise on top of the vertex colors, to further randomize the result and create more natural edges.

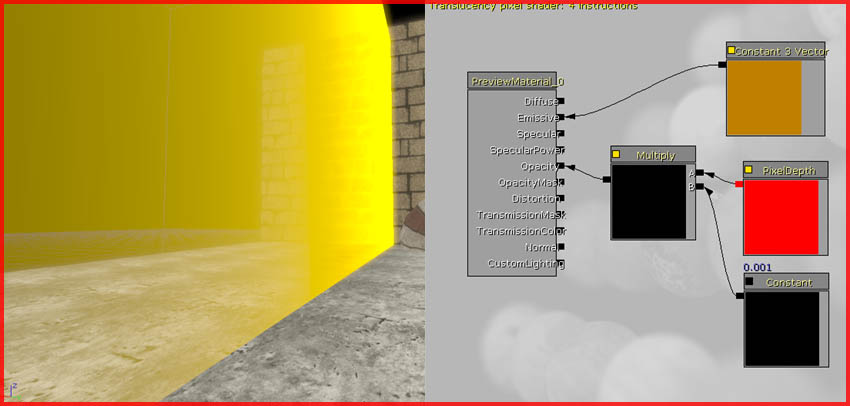
By using the PixelDepth expression, one can make a material that fades out the closer the camera, or the other way around. This is ideal for certain effects as well as for things like detailtexturing and macrotexturing. The material in the example was Unlit and had a Translucent renderstate.
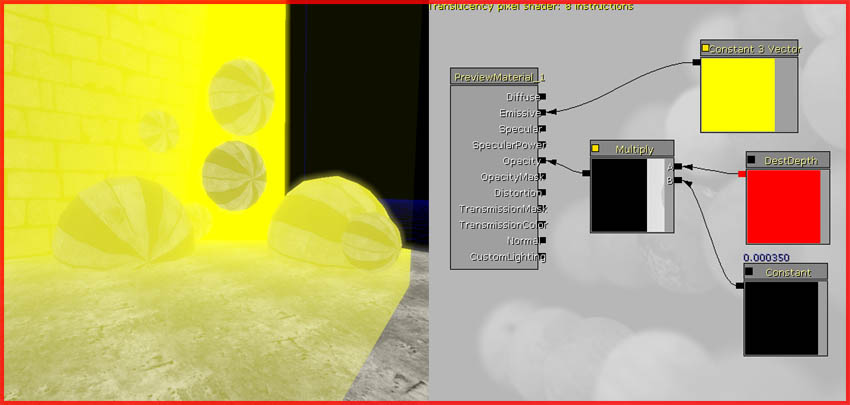
Faking distance fog through a material
Along the same line, it is possible to fake distance fog using a Destdepth expression. The color of the distance fog is determined by the Constant3Vector. The Constant that is multiplied with DestDepth controls the distance. This is a great trick to use on a watersurface, especially if it’s water players can’t get into.
The material in the example was Unlit and had a Translucent renderstate.
Rest page missing – Work In Progress