


Tutorials – UE3 Light Function
About : This tutorial will explain what lightfunctions are and how they can be used in Unreal Engine 3.
Target Audience : Intermediate.
Platform : Unreal Engine 3
Last Update : November 2007
What it does
Lightfunction is a very pretty word for something that does roughly the same as a projector in UE2, or the dynamic lights in UE1. Albeit not entirely identical, a Lightfunction
also projects a texture or color on to a surface and is great for faking advanced lighting effects.
A few examples of what can be done with Lightfunctions are :
Please note that Lightfunctions are a Dynamic Light feature. Any light with a Lightfunction will become Dynamic, obviously having quite an impact on performance. Use these sparsely!
How to set it up
Import your texture into a package and create a regular material for it. Add the texture as a TextureSample node and connect it to the Emissive
Input. After that be sure to enable the Lightfunctionality of the material by getting to the main properties of the material (click on some
empty spot) and scroll down a little. Go to the section Usage and enable Used As Light Function. In later versions of the engine this section has been renamed to Mutually Exclusive Usage.
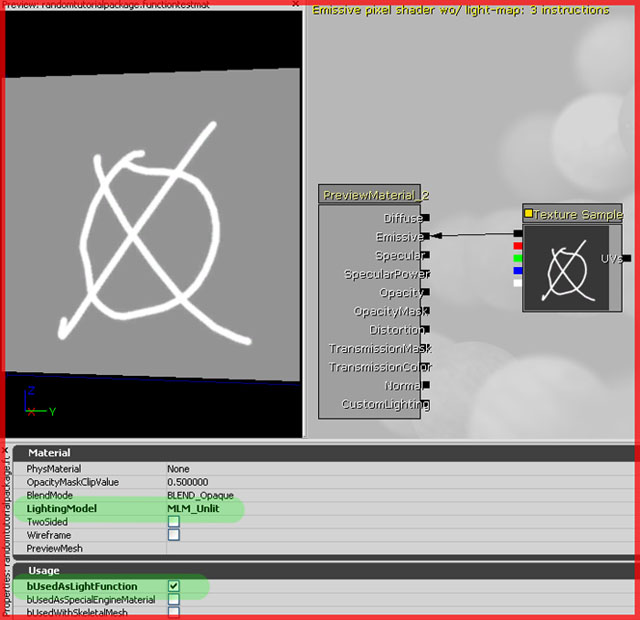
Optionally you can also set LightingModel to MLM Unlit although visually this will not have any effect but it does reduce the number of instructions.
Once you did that you’re done with the material, exit the Mat Ed and go to the Actor Browser. In there go to Actor -> Light -> Spotlight
(be sure to keep the master spotlight class selected, do not select any of the subclasses) and rightclick in your level to add the Spotlight
actor.
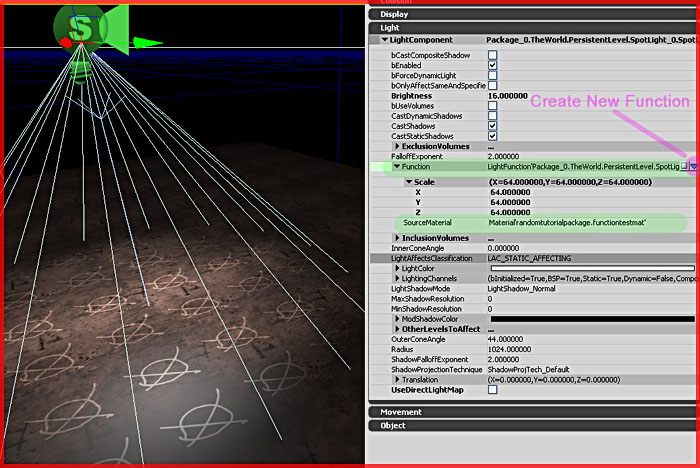
Once placed go to its properties -> Light -> LightComponent -> Function and add a new function by clicking on the little blue triangle
on the right of it. Then, fill in your material in the SourceMaterial field and possibly mess with the scale. Smaller numbers means a smaller
effect.
Non tillable
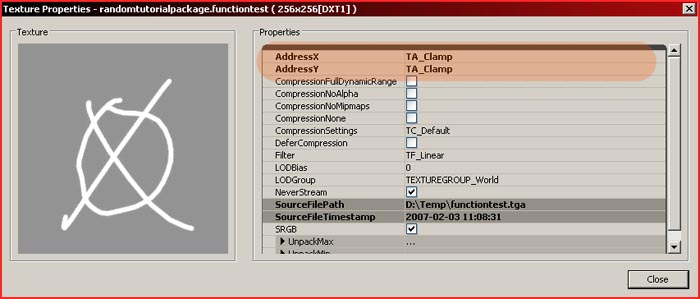
You can also set a material to display only once, ideal for those effects you only want to show once, such as shadows. To do so you first need to set the texture itself to Clamp mode instead of wrap mode. Rightclick the texture itself (not the material) in the Generic Browser, open its properties, and change the settings marked.
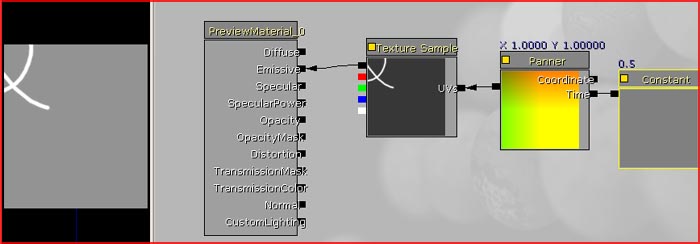
Once done, you should open the material, and add a Panner and a Constant expression to the Texture Sample you already had. Configure them as shown. The setup will offset the texture by half a space to counter the offsetting the lightfunctions always applies to everything. Without the Panner and Constant, the material would not show right below the Light.
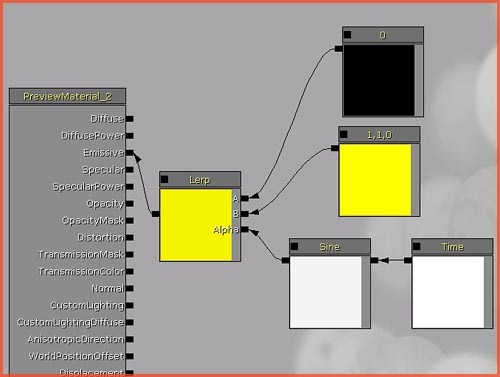
Flashing and pulsing lights
Making a light pulse is easy. Set up a material as shown below and you’re done! As explained in my material tutorials, the Sine and Time will make things pulse. The variable inside Sine controls the speed of the animation.
Searchlight
To create a searchlight you need to darken everything except the lightbeam. To do this you need a texture with a black background, contrary to the neutral (=invisible) gray background shown in the first example of this tutorial.
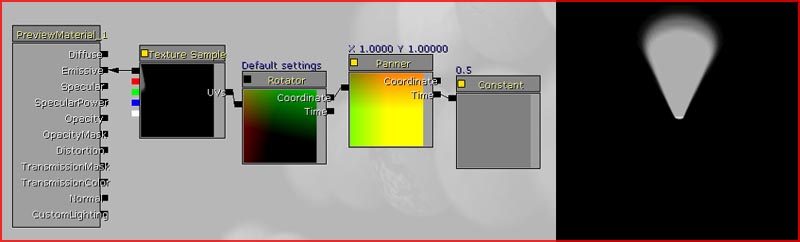
Set up the material as shown. Basically identical to the non tillable example discussed earlier, with an extra Rotator in between.
When done, it looks like this:
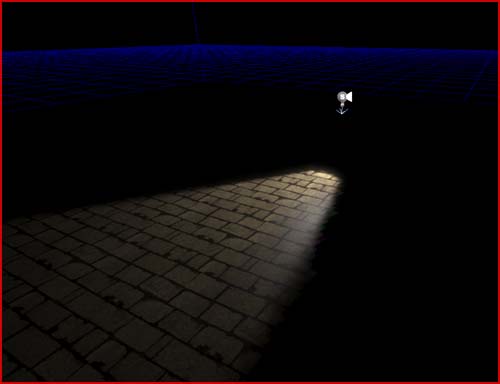
The opposite must be done for shadows. Gray background, black shape.