


Tutorials – UE3 Fracture Meshes
About : This tutorial focuses on Fracture Meshes. Fracture meshes are meshes that have been cut up into chunks by the engine, allowing them to break apart upon being shot/triggered.
Target Audience : Intermediate
Platform : Unreal Engine 3
Last Update : October 2009
Configuring The Mesh
The first thing that must be done is prepare a regular staticmesh for use as a fractured mesh. To do this open any staticmesh in any (uncooked) package. In my example I opened up a door. Next up, hit the Fracture button in the top toolbar and notice how a big new window opens up.
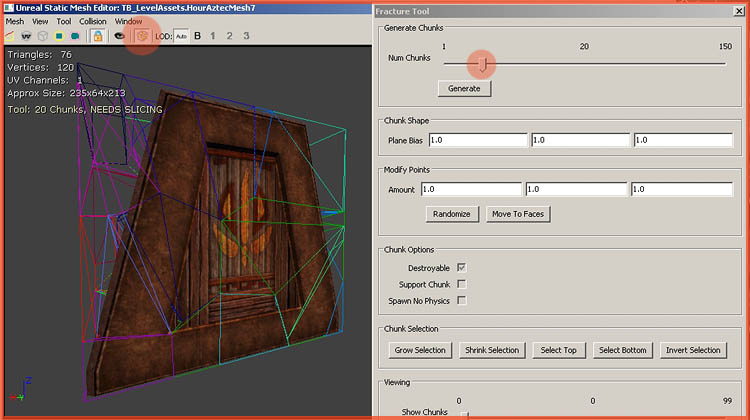
Start by setting the slider to the desired number of chunks and hit the generate button. As you will see the staticmesh is now divided into chunks.
Beware though, these changes are not actually applied yet until you hit the “Slice” button at the bottom. Do so.
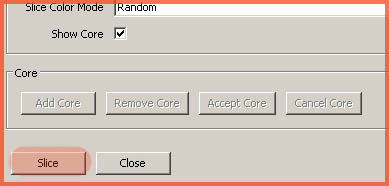
Notice how it will ask you where and how to save this newly created fracture mesh.

Next up, open up the mesh window of this new fractured variant by double clicking it in the generic browser, if it hasn’t opened by itself already. Notice how there are suddenly a whole lot more properties in the right properties panel.
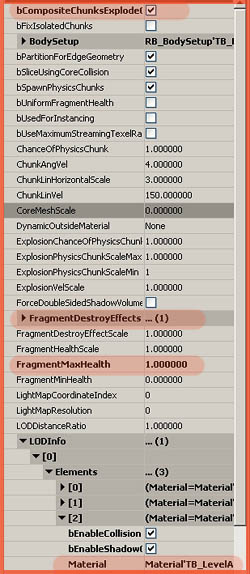
Lets go over a few of these new properties.
Close the window and while you keep the fracture mesh selected in the generic browser rightclick somewhere in your level and Add Actor – Add FracturedStaticMesh and the mesh will appear in the level as if it were a regular staticmesh
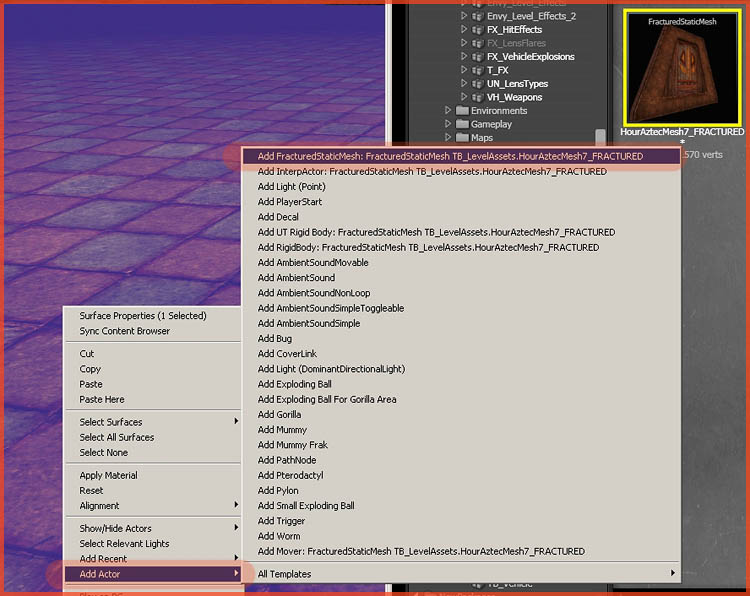
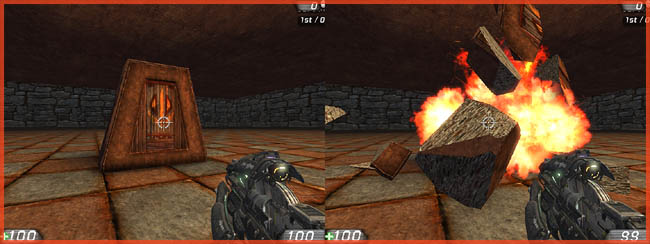
You are pretty much done! Play the level and shoot the mesh!
Additional Options
Have a look in the properties (F4) of the fractured mesh you placed in your level. A few additional options there.
Also interesting may be the fact that you can configure each chunk on an individual basis. Open up the fractured mesh in the generic browser again and hit the fracture button again.
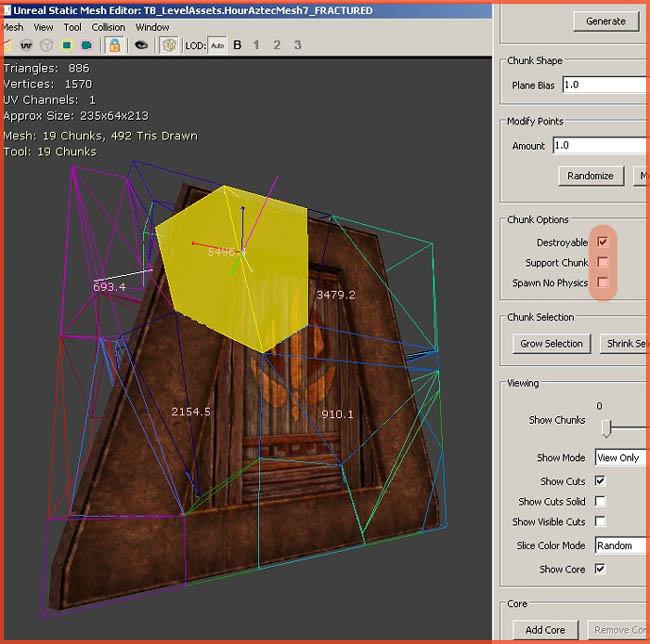
Now try simply clicking on one of the chunks in the viewport. A few options will light up if you successfully selected a chunk.
Notice the button “Add Core” near the bottom of the window. This allows you to merge in another staticmesh that will act as the “core” of the fractured mesh. The core cannot be destroyed and will stay around forever. That may be useful collision for example. It will make sure there will always be a wall, even if the wall is shot to pieces, and thereby it will not impact gameplay. A concrete pillar for example, may have a bunch of steel bar meshes as a core, to mimic reinforced concrete.