


Tutorials – UE3 Decals
About : This tutorial will introduce the reader to Decal Actors, used for adding damage, graffiti, tracks, and so on to the world.
Target Audience : UT3 – Intermediates
Platform : Unreal Engine 3
Last Update : January 2008
The Decal Actor
Decal Actors in UE3 are basically what Projectors were in UE2. They allow you to project a texture onto a surface, which is ideal for things like graffiti, damage, symbols, and so on.
Decal Actors should only be used for those projections that have nothing to do with the lighting, such as graffiti, and not to, for example, project a spotlight or fan shadow like you used to do in UE2. For those effects, there are now Light Functions available, please see my Light Function tutorial for that.
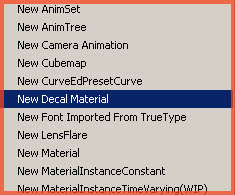
Only Decal Materials can be assigned to Decal Actors, so in order to create a Decal Actor, you must first create the correct material. Rightclick in the Generic Browser, and pick New Decal Material.
Once it has been created, simply add your texture the regular way, and connect it to Emissive, and set the material to Unlit and Modulated, as pictured.
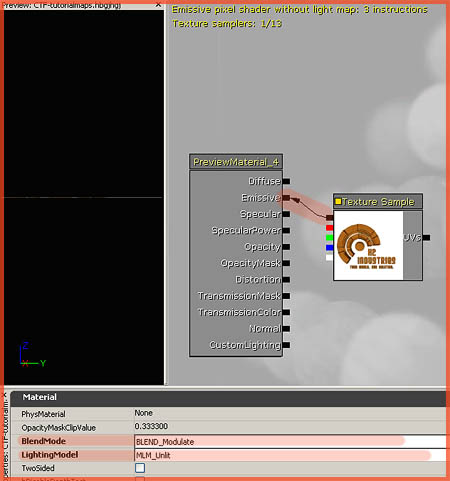
The Modulate approach works best for painted things such as this logo, or graffiti. By using a white background, and a modulate renderstate, the engine will neatly blend the image on top of the other surface, and also take lighting into account. Other types of projections might do better with an alpha map assigned to the material though.
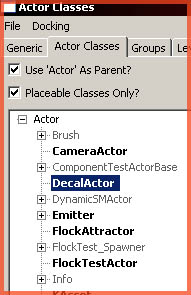
Close the Material Editor window but make sure you keep the Decal Material selected in the Generic Browser, and go to the Actor Browser. Select Decal Actor near the top of the list.
Rightclick a surface in the level, and pick Add Decal from the menu.

The decal should now show up!
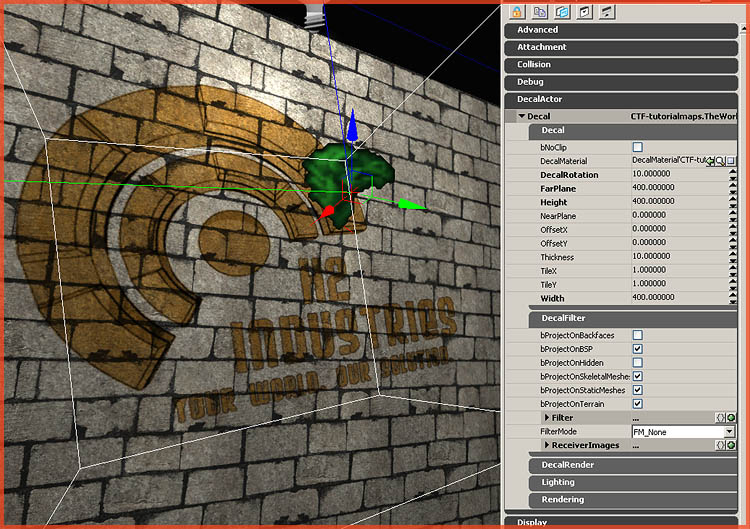
Open up its properties, and in the section DecalActor – Decal – Decal you can find back a number of important properties.
bNoclip: Whether or not to tile the material.
DecalMaterial: The material used for the projection.
DecalRotation: You can rotate the projection with this property.
FarPlane: After what distance nothing will be projected anymore.
Height: The size of the projection, use in combination with the Width property.
NearPlane: Similar to the FarPlane.
OffsetX and Y: How much to offset the projection.
TileX and Y: How many times to tile the projection.
Width: See Height
Also note that in the section DecalFilter, you can control on what exactly the Decal Actor may, or may not, project the material..
Lastly, know that Decal Materials can also be animated in the Material Editor, for additional coolness.