About :
This tutorial will talk you through the basic process of making a simple box modeled cave in a 3D program. The tutorial will only show the step by step progress of a cave I made for one of my UT2004 levels. It does not describe how every step was done, it will however point you in the right direction. You require basic understanding of the 3D program you use! 3DSMax and a tiny bit of Maya are used in this tutorial.
My book contains a small section on what exactly makes a cave or a rock look good and what doesn't so for those who are interested..
Target Audience :
Everyone – intermediate skill required
Platform :
Everything
Last Update :
August 2006
Though the cave in this tutorial is made with 3DSMax it's perfectly possible to use the same technique for any other modeling program such as Maya.
I use box modelling to model my caves. Often used techniques such as throwing a noise modifier on a sphere or cylinder or by using two terrains/plane meshes leads to very random and messy results. Manual work is the key to good quality.
The cave technique could also be applied to older games such as Unreal Engine 1 UT and Unreal although the polycount will have to be ridiculously low. I made most of the caves in UT1 Xidia in 3DSMax, greatly speeding up the process and improving the result..
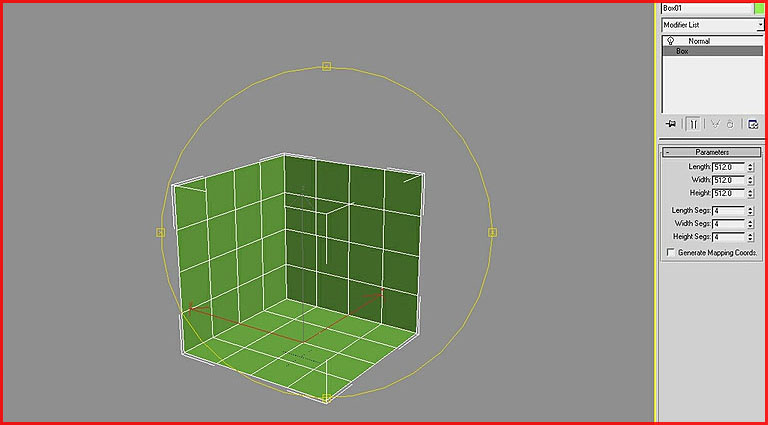
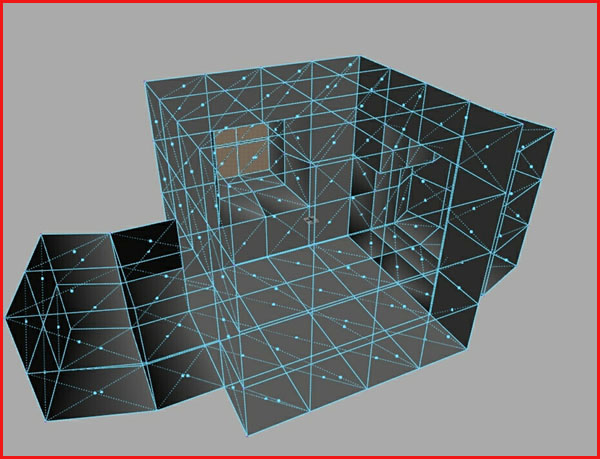
I started with a cube and was sure to give it enough tessellations. The amount of tessellations is dependent on the size of the room but sure to keep it quite blocky. It will be MeshSmoothed later.
Next I applied an Edit Poly modifier and start extruding faces to create corridors and rooms.
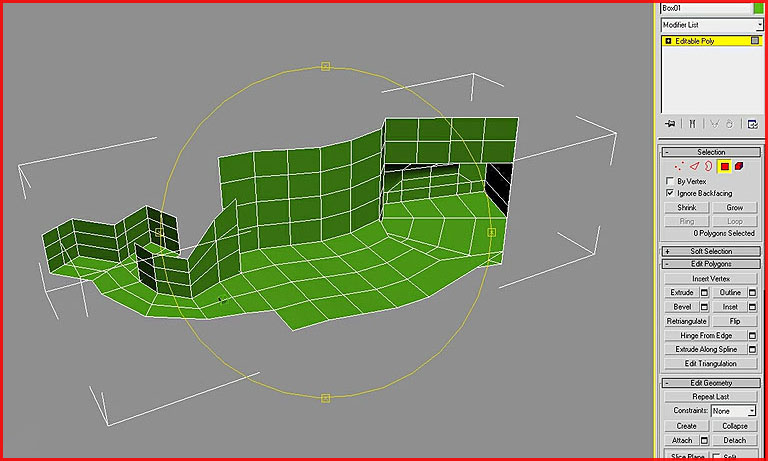

The basic floorplan was almost complete in this picture.
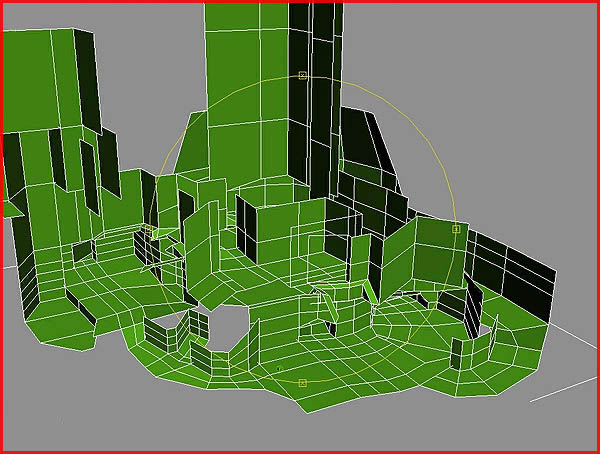
After the model has been cleaned and optimized it must be randomized. I randomly dragged vertices, faces and edges around to make it all appear more natural and random.
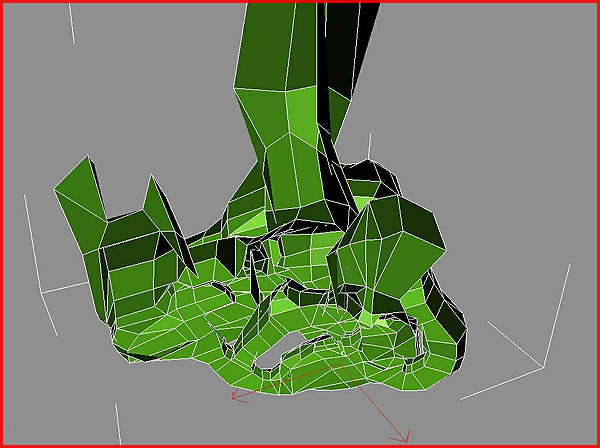
After the model was cleaned and randomized I applied a MeshSmooth Modifier to it. Set the iterations to 1 and you will end up with a nice medium high poly cavern.
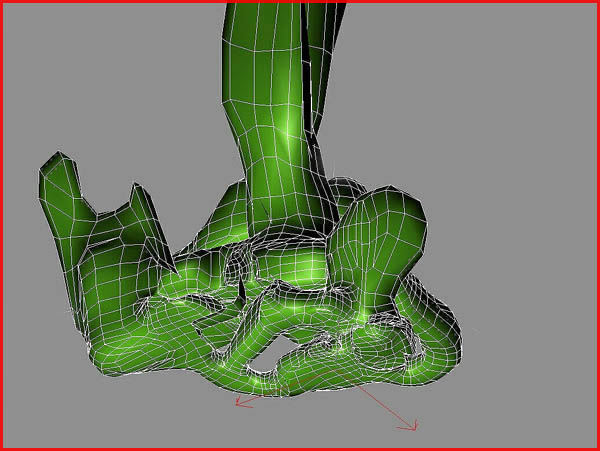
As you might notice the cave has a lot of useless polys on some spots and it is in general too smooth and flat for a natural object so start optimizing and cleaning it again! Again start to weld certain vertices together and pull on those polys, edges and vertices to make it all rougher and more random. Soft Selection can also come in handy now. Making a few manual extra cuts certainly too.

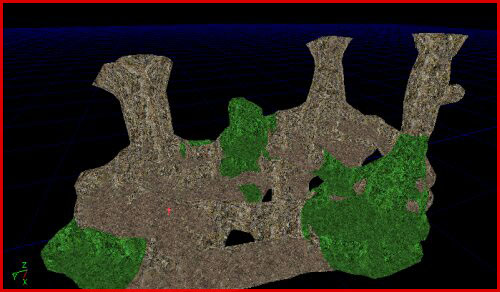
I only applied a single texture to the mesh because of my Vertexpaint texture blend technique. I wrote a separate tutorial on that subject.
I applied a UVW Mapping Modifier and set it to box mapping before I undertook further UVW steps.


If your cave is meant for ingame usage you can and should optimize the cave by cutting it up in multiple pieces.
In Maya and nearly all other 3D programs you can use the same method. Start with a cube.

And randomize everything to make it look more natural.

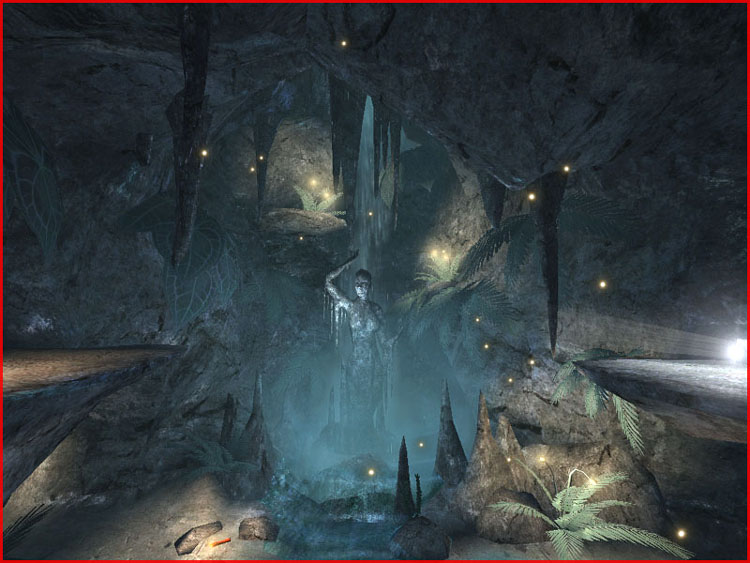
After a week of work the cave build in the 3DSMax part of this tutorial looked like this ingame: